NHMGS held Drumbeat, our annual mid-winter game day, this Saturday at the Lake City community center in Seattle. Drumbeat is the brain-child of Dick Larsen (Yes, Dick has a brain and his brain has children) who looked and beheld the winter doldrums and saw that it was not good. I'm not sure when the first Drumbeat was held, but it's become an annual effort, helped immensely by the efforts of John Kennedy of The Panzer Depot. (Drumbeat is perhaps the only event where you can observe John outside the native habitat of his store.) We started out at a location in South Seattle, but moved to the more convenient (at least for me) location in Lake City some years ago.
I played Bill Stewart's Battle of the Marne game. He wrote a 2-page rule set with simple move, combat, and morale. The situation was a handful of French troops in 1914 holding off what must have been the entire German army.
The last battalion stands between Paris and the Hun
Bill painted all the figures (beautifully), made the buildings (also beautifully) and most of the other terrain. He even supplied the pennies to use as "prone" markers for the units. The rings around the figures heads in the pictures aren't scale versions of toilet seats or those small styrofoam flotation rings. They're what old-school gamers know as casualty markers.
A sea of feldgrau about to wash over the few islands of bleu
Steven Puffenberg and I were Les Français, Dick Larsen, Scott Murphy, and Mark (?) were Les Boches. I had a feeling from the start that this game would make Custer's Last Stand look like a even match, only our Sioux were in feldgrau and carried Mausers.
The imminent collapse of the French left
We were outshot pretty early on in the game. Scott's Krupp Feldkanone knocked out my Soixante-Quinze in short order and then proceeded to play havoc on my troops in the buildings. Before long were were in a last-ditch effort to survive the onslaught. We made it through about five turns before the inevitable end.
After the game, Bill, Mark, Scott, and I repaired to The Elliot Bay Brewery for lunch and suds. The brewery occupies the location of the former American Eagles hobby store. Bill used to work for Mike Edwards at American Eagles in the 70s (in their Greenwood location) when he was a student at the U. Lunch at Elliot Bay always has a bittersweet taste.
After lunch, I fell in with Mike Lombardy and Troy Wold. We got Kaffee und Gebäck at a little German coffee house (Haus?) just a few stores down from the brewery. I'm not sure how recent it is, but it's a pretty nice place and the pastries (das Gebäck) are wunderbar! On the way back to the community center, we decided to play a game of Jugula, which Mike conveniently brought along.
I have the rules and cards and have been painting the 35mm minis for Jugula, but have been mostly ambivalent about which rules to use for gladiator games. Playing Jugula for the first time has convinced me that it's the way to go.
Across the deadly sand I go...
The game is heavily dependent on card deck management. A player's turn involves playing one of the cards from his hand and doing one of the things the card allows. The allowable actions can be moving x number of figures, attacking x number of times, increasing your popularity with the crowd, drawing more cards from your deck, adding primo cards to your deck, or some other special action specific to the card.
Troy's boys waiting
Mike read the rules and Troy and I squared off against each other. I had two heavy gladiators and two lights; Troy had three heavies and one light. I advanced right into the arena from the start, while Troy bid his time increasing his popularity and adding primo cards. The advantage of popularity (the Vox Populi track) is that your gladiator's attack and defense values increase as your popularity does. By the time I hit Troys figures, he was already at +1 against me and soon made it up to +2, +3, and +4 while I was still mucking about using my cards to move and attack.
My scissors wounds Troy's secutor
I managed to finish one of Troy's gladiators and wound a second, but the disparity in Vox Populi started to tell against me. Troy's wounded secutor came back and finished my scissors and then proceeded to go after my others. I eventually caught up in Vox Populi, but too late to matter. My last gladiator went down surrounded by Troy's three surviving gladiators.
Drumbeat turned out to be a nice diversion as I head into a very busy week with work and parish activities. Next Saturday I'm cooking Cajun for about 60 people.
Second only to my love of slingers, I have a strong affinity for those crude, awkward, smokey, fearsome boomsticks of war: the medieval handgonne. I think they share with slings that aura of primitive ersatz simplicity. As the first hand-held gunpowder weapons, they're direct ancestors of today's small arms. We've gone from handgonne to S-Mart's top of the line and it only took about six centuries.
The Handgonne at War
Gunpowder came into European warfare in the 13th century. Where it came from is still a matter of debate. Conventional wisdom in the 19th c. claimed that it originated in China and came through Middle East trade routes or perhaps in the Mongol invasion ca. 1240.
Unconventional wisdom in the 18th c. had it that gunpowder was discovered accidentally by a German monk/alchemist named Berthold Schwarz who was trying to cook up something else when the crock-pot exploded. However, there is no evidence that Berthold Schwarz ever existed.
Brother Berthold discovers gunpowder, to his dismay
Roger Bacon's treatise De Secretis Operibus Artis et Naturae is the first mention in writing of the formula for gunpowder. Bacon's formula was 7 parts saltpeter, 5 parts sulfur, and 5 parts charcoal, in case you're dying to know. That works out to 41.2% saltpeter, 29.4% sulfur, and 29.4% charcoal. By comparison, the gunpowder the British army used in the 18th c. is 75% saltpeter, 10% sulfur, and 15% charcoal, which is near to the ideal formula. Bacon's formula burns too slowly and doesn't provide enough propulsion.
It's the propulsive properties of gunpowder that sparked a revolution. Artillery was invented first, but ribauldequins, which were carts mounting several very small cannon, inspired the handgonne, which was simply one of these small cannons, mounted on a short pole that could be managed by one man. Ten guys with handgonnes were tactically more versatile than one ribauldequin with ten barrels.
The majority opinion is that a handgonne was a terribly inaccurate weapon due to it lacking any aiming features, as well as the need to hold it in one hand while using a fuse held in the other hand to ignite it. But modern reenactors have shown that the opinion is mostly false and pointed out that other hand-held missile weapons, such as bows, crossbows, slings, and javelins, lack aiming features also but users can achieve incredible accuracy nevertheless.
Swedish reenactors shooting a handgonne
Early handgonnes were nothing more than a metal tube with a touch-hole at the breech end mounted on a wooden pole (called a tiller). The ignition came from a slow-match or hot wire being applied to the touch-hole, which set off the main charge. Projectiles were arrows or crossbow quarrels, lead or clay bullets, or small rocks. No patching was used, so the propulsion was diminished and the muzzle velocity attenuated quickly. However, a hit at close range (about 25 paces) could easily penetrate armor. Though much is made of the smoke and noise being a fear factor, the reality is that once troops were seasoned, they would be less afraid. Still, gunpowder and gunpowder weapons were considered something dark for quite a while after their introduction to warfare.
Death shoots a pale handgonne
As the technology advanced, handgonnes began to look more gun-like. Later handgonnes had something more like true gunstocks, rather than tillers, and sported serpentine levers that enabled the user to mechanically apply the match to the touch-hole. The development continued up until in the late 15th c. when the handgonne had essentially become the arquebus.
The slow rate of fire made handgonners particularly vulnerable to attack when they were used in the open field. For this reason, hangonnes were most effective when used in sieges (attacking or defending) or in defending field works. Gonzalo de Córdoba's great victory at the Battle of Cerignola in 1503 marked the point when firearms started to replace earlier hand-held missile weapons en masse and the start of the long-held dominance of the Spanish pike and shot tactics.
Painting Handgonners
Inspired by my new painting velocity using The Miracle Dip™, I've been looking at a handful of abandoned projects to kick-start back into life. One of these projects goes back more than 20 years when I bought a few packs of Grenadier fantasy figures.
The old Grenadier fantasy range had, in addition to orcs, elves, dragons, goblins, etc., a line of humans that were modeled after 15th c. Burgundians—the army of Charles the Bold. These are very nice figures, sculpted by Mark Copplestone in the '80s. The whole range included all kinds of variety with multiple poses for each type: mounted and dismounted knights, mounted men-at-arms, pikemen/spearmen, longbowmen, crossbowmen, halberdiers/billmen, artillery, and handgonners. Charles would approve.
I bought my packs at the now out-of-business American Eagles when they were in Ballard, WA. They only had a few packs and I bought 'em all, which netted me: 10 halberdiers/billmen, 10 handgunners, 2 large handguns with 2 crew each, a small bombard with 2 crew, and some command figures. At the time Grenadier in the US was going under and it was hard to get the figures anywhere in the benighted, insular, pre-Interwebs days. I started painting what I had, but couldn't do much with them, few as they were. I completed the giant handguns (but later sold them at a swap meet). The other figures sat partially painted in a box that traveled with me through three house moves over 20 years. Every now and then, I'd run across them while looking for something else and I'd think that I should get to work and finish them.
Just before Christmas, I resolved to finally do it. Only instead of finishing what I'd started, I was going to strip them and start over. I've only done this a few times. It's not pleasant. I use the Pine-Sol soak 'n' scrub method. I do it the manly man way without gloves, which is supposed to ruin my hands, but so far not. Nevertheless, I'm still prepared to stop if I see a finger dissolving.
The first step was to pry them off the thick plastic bases I'd put them on. Though I recall that when I started painting them, they were just glued to cardboard squares for better handling. I put them on the 20mm x 25mm plastic bases when I was doing a late medieval variant for Tod Kershner's Pig Wars skirmish rules. One of the reasons I hate rebasing is that I base so thoroughly that it's a tough go to de-base the figures. I have sold armies of painted figures rather than rebase them.
Once off their bases, I put the lot in a plastic food container and drowned them in Pine-Sol. The Pine-Sol doesn't dissolve the paint, but it breaks it down so that scrubbing with a firm toothbrush will remove the paint. Theoretically.
Pine-Sol bath
Sometimes it takes a bit more elbow grease and a second (or third) soak 'n' scrub to get it all. Eventually, and at great risk to one's hands, you get a nice pile of bare, clean, shiny, scrubbed minis to start over with.
First scrub (more to do)
I've started for now painting the 10 handgonners (because they're who I love). Grenadier had one pack of five different figures. I got two packs, which still allows for variety, especially since I paint each figure differently. It takes longer to make each figure unique, but block-painting is still pretty fast. I just wind up switching colors a lot on my palette.
Block painting complete; ready for the satin enamel spray
After the block painting is done, I gave them a spritz of clear satin enamel as a prep for brushing on the Minwax stain.
Once I've completed the dip, I give them a spray of Testor's Lusterless (i.e., dullcote) as the penultimate sealer before basing and flocking.
Dipped and dullcoted
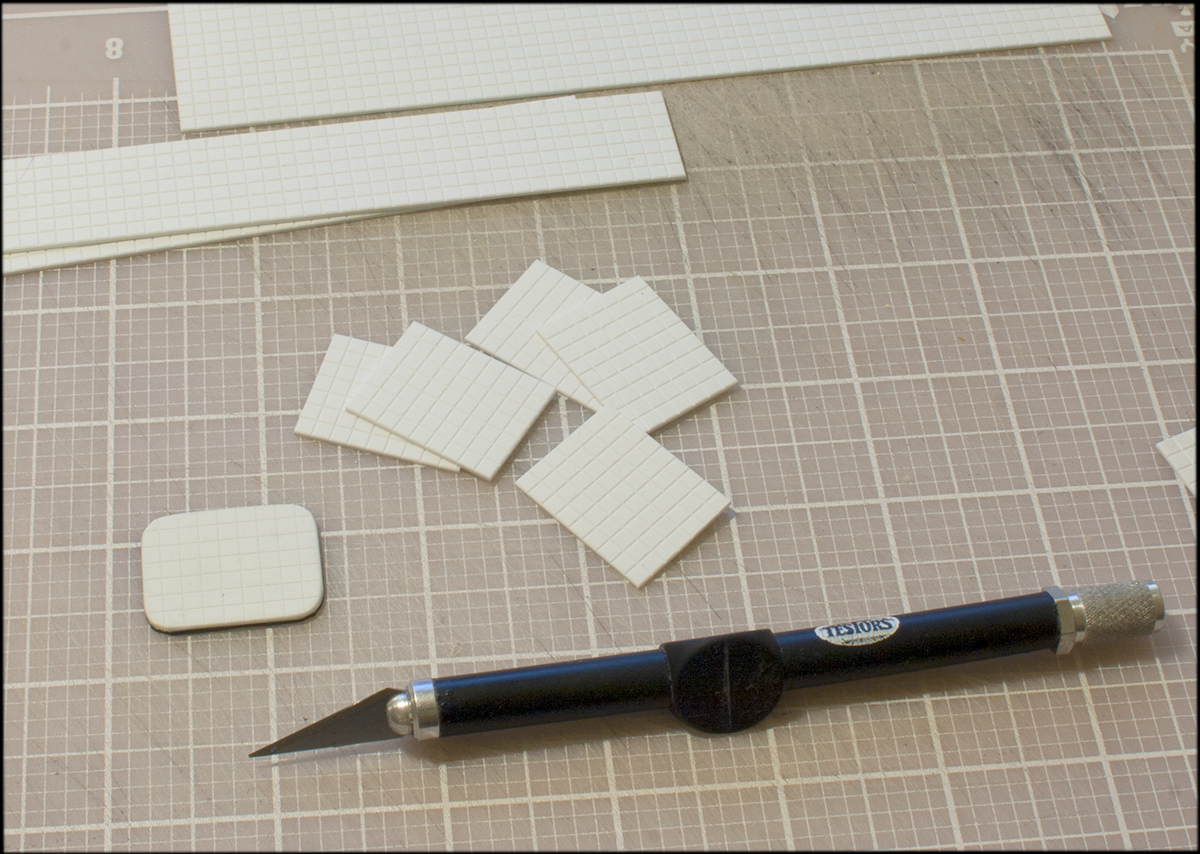
Because I'm using the figures for skirmish gaming, the single bases don't need to be any specific size. Typically I use 20mm x 25mm bases for 28mm figures (the William Stewart Standard Base Size™). For my ECW skirmish figures (Renegade and Bicorne), I used larger bases (25mm x 30mm) because the figures are "heroic" 28mm figures with a large footprint. The Grenadier figures are less heroic than the Renegade, but have big footprints. I compromised and used some 1/8 inch tile sheet styrene. I score the tiles at 7/8" x 1 1/8". The resulting base is a bit more narrow and very slightly less deep than the ECW bases.
Cutting bases from 1/8" tile sheet styrene
The tiled sheet styrene makes it easy to cut bases to the right size and also facilitates rounding the corners for a more skirmishy-looking base. I affix the cut bases to the sticky side of some magnetic sheet material from Litko, and then trim off the extra, round the corners, and sand everything smooth with fine grit sandpaper.
I glue the figures to the base using Gorilla super glue and then slap some Golden coarse pumice gel around to hide the rather thick base that comes on the casting. I learned the coarse pumice gel trick from Kevin Smyth. I apply the medium with a palette knife and let it dry for 12-24 hours. The surface is rough and lends itself well to painting and drybrushing.
I had a small pumice crisis to overcome first. I used to get the medium from Michael's, but every store I tried didn't have it. I was afraid it might be a discontinued item (that happens to me a lot). I finally went to Aaron Brothers art supply and got a 8 oz. jar at half price, as well as several Windsor Newton University Series 233 brushes in 000 and 00 sizes in their 1¢ sale (buy one, get one for 1¢). I've used these brushes for years to do my detail painting. Nothing else works for me as well.
When the medium is dry, I trim off the excess with an X-Acto knife. I use slightly thinned Vallejo Mud Brown as my base color and after that dries, I drybrush Vallejo Yellow Ochre over it to bring out the rough texture of the pumice gel medium.
I flock the bases with Woodland Scenics Earth Blend blended turf, leaving patches of 'bare ground.' Then I apply a second layer using Woodland Scenics Light Green coarse turf. After the glue is well dried for the coarse turf, I use some tweezers to pluck it short. The desired effect is a rough surface; tweezing reduces the puffiness of the turf. (I also need to tweeze out the bits of cat hair that get into my flocking, otherwise the bases might look like they have the kind of wispy beards that older women get.)
When the turf is all right, I go over the base edges with some Vallejo Mud Brown, and then give the figures a final spray of Krylon Matte Finish. The Krylon matte is a not-quite dullcote, but not quite a satin either. It leaves just a glint of satin finish on the figure that softens the harsh lusterlessness of the Testor's dullcote.
20 years in the making! Handgonners completed.
Lion Rampant
I'll use the figures I have as seed for one or more Lion Rampant retinues. I wanted to get medieval earlier, but nothing came of it because I couldn't really find a set of rules that I liked and that I could reasonably expect to find other people willing to play (and contribute to by painting minis). Lion Rampant changed that. It's very popular around here. The Tacoma gamers have regular Lion Rampant game days.
Early gunpowder weapons didn't make the cut in Daniel Mersey's published rules. Mersey did, however, provide some stats for them on a Boardgame Geek forum. because, as he notes, "there are some lovely models available for early handgunners." (As we see above.)
Below is a formatted version of the handgonne rules from the forum post.
Unit Name: Handgonners
Points: 4
Attack
7+
Attack Value
6
Move
6+
Defence Value
6
Shoot
8+
Shoot Value
6 /12"
Courage
4+
Max. Movement
6"
Armor
2
Special Rules
Bang, Panic
Models per unit: 6
Special rules:
Bang: All units count as Armour 1 against Shooting by this unit (Armour 2 if in cover).
Panic: When this unit Shoots, the target unit must take a Courage test regardless of the number of hits inflicted.
Unit upgrades:
Pavises @ 2 points per unit. As for Crossbows.
Also, one poster to the forum suggested an option for having a handgonne blow up. Like the "lucky blow" rule, when the handgonners shoot, roll 2 x D6. On a double-one, remove one handgonner.
Grenadier Lives!
More good news is that Grenadier Models aren't dead and gone. Mirliton in Italy produces the full range. Packs of 5 foot figures or 2 mounted run about €8,16 (about $8.86 USD). The kicker is shipping. They charge a small fortune to ship. Unless you're ordering a lot of figures, you're getting soaked. Happily, Mirliton offers 10%, 15%, or 20% discount based on the amount of the sale. That makes shipping costs easier to swallow. At some point this year I'll use my tax refund to make a big purchase so I can get several units for Lion Rampant, enough for two retinues or to be able to mix 'n' match to make a lot of variations on one retinue.
I'm not aware of any US distributor for Mirliton. There is a UK distributor, but their prices are nearly twice the Mirliton prices, plus shipping costs from the UK.
Update 6/3/2020 - Grenadier has crossed the ocean!
There is a source for Mirliton/Grenadier minis in the US, so you can avoid the huge shipping costs from Italy and/or the UK. It's Noble Knight Games. They've had them for years, and I've known they've had them for years; I'm just getting around to updating the info here.
I dropped by The Panzer Depot in Kirkland, WA today where Steve Puffenberger ran a small Napoleonic game using the Black Powder rules. The scenario was a small encounter in Spain. Two French brigades with some cavalry and artillery support attacked two smaller British brigades holding a small hill top town position. The British also had a supporting Spanish brigade coming up to their rear. Mark Serafin and I were the Frenchies, Steve and Ken Kissling were the Brits and Spanish.
At the outset, Mark and I viewed our chance of success as minimal. British troops in line holding a decent position are pretty secure and in Black Powder towns are nearly impregnable fortresses. Faced with the immovable object, we did not see our troops as anything like an irresistible force.
I had three légere battalions and two ligne battalions in mixed formation with skirmishers deployed forward. Facing me were Steve's two British line battalions, a battery of 9 pounders, and a rifle company.
Mark had four ligne battalions, a battery of horse guns, and a squadron of Hussars. We also had an 8-gun battery of divisional troops. Facing mark were Ken's three British line battalions with a squadron of light dragoons in reserve.
The game started with a small preliminary bombardment that managed to inflict casualties and disorder a couple of the British line—although that was't something we could take advantage of. Our first turn saw Mark and I both failing our first move attempts and the initiative passed to the Brits.
With turn 2 things started moving faster. Mark and I both managed to move up with all our units and start trading shots between our skirmishers and theirs. On my third turn, I decided to grasp the nettle and charge in with a légere battalion in colonne d'attaque against one of Steve's line units. Another léger battalion smacked into his battery, with the third battalion in support of the two in contact.
I gritted my teeth expecting the withering fire of Steve's British, but he wiffed the shot, rolling 1-1-1-2 for closing fire. My battalion attacking the battery was not so lucky. I took a hit and was disordered. However, I passed the break test and the combats proceeded.
I beat the line battalion just barely, but Steve rolled a '3' for his break test and bye-bye line battalion. The guns also lost the combat and were taken. Having expected the worst, I was suddenly in a commanding position, even though there were two unbroken British line battalions and a detachment of riflemen nearby.
At this point, Steve counterattacked with his remaining line battalion. My closing fire inflicted a casualty, and in the ensuing combat, Steve again lost and rolled low for his break test. The second of his line battalions was gone, only his riflemen remained and his brigade was broken.
Steve counterattacks!
Steve broken, Ken's flank exposed
On my next turn, I attempted to charge the flank of Ken's rightmost battalion, which was now exposed with the collapse of Steve's brigade. However, I failed to roll well enough on my command dice and didn't manage to contact.
At this point, Ken withdrew the battalion into the town before I could try to hit it again. Steve plinked away at one of my légere battalions, which I'd put into line, and managed to cause it to become shaken. Steve would keep at this unit, which remained shaken for the rest of the game, but always managed to pass its break tests.
Ken withdraws to the town
I still had four effective battalions, but I was afraid I'd just keep battering my head against the town. By this time, too, the Spanish brigade had come up, although Steve kept it back and out of trouble.
I charged into the town with one légere battalion and another in support and got shoved back. I tried again next turn and although I lost, I managed to stay in contact.
First assault
On my third attempt at the town, I managed to bring one of the ligne battalions into another face of the two, so I had 2-1 odds, plus more support from other units. In this final attack, the British lost and broke on their break test (they were at -3 for shaken and excess casualties).
Final assault
La ville est à nous!
On Mark's side of the board, he'd been skirmishing with Ken's other two battalions, one of which was in another two section. He'd managed to shoot the other one into a shaken state. With the loss of the one battalion in the town and another shaken, Ken's brigade was broken and the game was over. No one expected the Spanish to save the day. They were too few and too bad.
The game did not go at all as expected. I thought Mark and I would get shellacked on our attempt to take the position. Instead, much to our surprise, the British crumbled in just about 8 turns.
I'm sure the news made Wellington's stiff upper lip a bit stiffer.
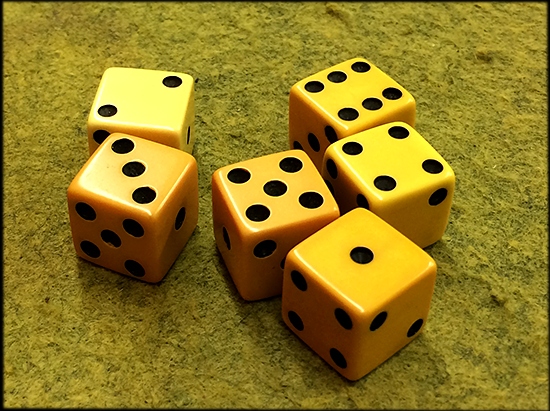
I'd be remiss not to mention that this game saw the debut of my newly acquired vintage bakelite dice. I picked up 25 of them in a few purchases on eBay and Etsy. They're nicely yellowed and range from a kind of jaundiced putty to a deep butterscotch, which gives them character. A nice addition to my dice collection and—for this game at least—lucky.
I've completed 31 figures using the "dip method" in just over a week, which includes 24+ hours for drying the dipped figures. I never had that kind of productivity before. Suddenly painting a lot of figures seems easy and I'm pleased with the results—almost more I am with my traditional, slow method.
The second batch of figures I did were some Thirty Years War officers and sergeants along with the two Renegade ECW test figures. All were in buff coats with riding boots and some kind of armor and sashes. As an experiment after my first batch, I wanted to use a gloss or satin coat pre-dip to see if the less toothy surface reduced the amount of "grime" that comes from the dip.
For the officers/sergeants I used Krylon polyurethane satin. I've used it before as a penultimate coat before the final dullcote. The polyurethane is a great protector of the painted figures. However, it's proven to be a bad pre-dip. It took a long time to dry. The can says that it dries in 15 minutes, but it still felt a bit tacky to the touch after 48 hours. It seemed to hold a lot of the stain rather than slough it off to the crevasses (more on that below).
Second batch of officers/sergeants - a bit darkish
The next batch was more musketeers and some drummers. For this batch I used Rust-Oleum satin enamel as the pre-dip. This turned out much better than the polyurethane and dried quickly hard and smooth.
I dipped both batches at the same time. The first thing I noticed is that the stain seemed to be more viscous than when I'd brushed it on the first figures I did. The can had been resealed well, I think, but it had sat in my cold, cold garage since I used it first. I'm no chemist, but it might be that the cold affects the viscosity of the stain. It seemed to flow and ooze less well than before and wicking/drawing off the excess with the brush didn't seem as effective.
The result is that these last figures had a bit more puddling and, for the polyurethane coated figures, a bit more of the stain stuck to the surface. However, I think the result was mostly good. I let the dipped figures dry for more about 35 hours and then gave a them a spritz of dullcote yesterday evening. With the sheen taken off, the colors came out nicely. Set side by side with the musketeers from the first batch, they don't appear to be different.
First and second batch musketeers side by side
To offset the viscosity problem with the stain, I'm keeping it indoors for the winter. I also transferred it from the can to an airtight mason jar. In resealing the can last time I discovered that my "tapping" the lid with a hammer to seat it fully was bending the can. I don't know my own strength apparently.
On the painting table are the first batch of 16 Imperialist pikemen which are just about ready to spray with the satin enamel for dipping later tonight. I've also got 8 artillerymen and three guns. And adding more clutter to my too cluttered painting table is a batch of 5 Renegade ECW pikemen, an officer, and an ensign. I like how well the two test figures turned out, so I'm going whole-hog on getting my batch of Renegade/Bicorne ECW painted for skirmish gaming.
ECW dullcoated and bases flocked
For now, I'll use the ECW for playing Smooth & Rifled from Dadi & Piombo. Eventually, I hope to use them for Dan Mersey's upcoming Pikeman's Lament, which is his pike 'n' shot variant for Lion Rampant. Alas, the wait will be a long one; Osprey won't publish it until late 2016 or early 2017(!).
I made another raid yesterday on the remnants of The Assault Group figures at The Panzer Depot. At 70% off, they're a great deal. I managed to get another 16 artillerymen from the ECW range (not at all distinguishable from Thirty Years War) as well as some more command figures and musketeers.
Also, in yesterday's mail arrived the two falconets I'd ordered earlier in the week from Old Glory. I already have two that I'm using a battalion guns for the 1672 French.
French falconette (old painting method)
They're very nice models and I want my big tercios to have some light gun support—two can play at this game, Gustavus Adolphus!
The transformative nature of this method kind of astounds me. Some gamers call it the "miracle dip" and I can see why. I spent so much time trying to get subtle shading and highlights in my figures and I look at my quick 'n' dirty dipped figures and like them better. Seeing the figures in macro photos, the smoothness of the shading in the dipped figures is much nicer than my awkward brush strokes. Viewed at table-top distance, my old method looked a lot like solid colors; you couldn't see the effects of the shading unless you looked closely. The dip looks good close and far.
Why, oh why, did I wait so long to join the dippy revolution?
My fear now is that Minwax will discontinue the Tudor stain color. It's already impossible to find in stores. I had to order my can from Amazon.
I've become a devotee of the "dip method" for rapid army painting. I have seen the light and shan't be looking back. I know several gamers who are dippers. I've scrutinized their results and found them to be a delight to the eyes. But I've been hesitant to adopt it because it's such a departure from my traditional method. Old habits die hard, as the saying goes. I've also been reluctant to adopt a "quick 'n' dirty" method, simply because it seems like a cheat.
My traditional method developed over years with only incremental changes. It involves an intricate combination of highlighting, shading, and washing and can be painstakingly slow. As a result, my output over the years has been pitiful. I have many projects that are started but stalled. I have boxes of figures that have been cleaned and primed for painting—or partially painted—and then left to languish. Motivation is certainly a problem, no matter what painting method I use, but the knowledge that I'm facing a slow, painstaking process to get figures painted is no aid to motivation.
When I really concentrate on a figure, I'm very happy with the results. My test case for painting the stalled1672 project is based on a Swedish uniform color from the Scanian War. It represents the best I can do with my traditional method, although for painting large numbers of figures, it's prohibitively slow, so the units I've already painted for the project use a bit more streamlined process.
Sätt i gång! (fire away!)
Note: The slightly bent musket is post-painting damage from when my evil cat Maebh the Merciless, batted it off the shelf and played floor hockey with it.
When I finally got to the point of trying the dip, I thought about a long-stalled batch of 12 Thirty Years War musketeers, a drummer, and an officer from The Assault Group range. These are beautifully sculpted figures and I wanted to do them justice with a great paint job, but after starting them, I shelved them for years because a) I'm lazy, and b) I didn't want to launch into a solo Thirty Years War project. However, a group of gamers down at The Panzer Depot have been working on a big communal TYW project, so my efforts can supplement that with a tercio or two. The time is right.
So what is the dip method? It's basically using Minwax Polyshades Tudor wood stain to do instant "miracle" shading on figures that are otherwise just blocked out in solid colors (i.e., not shaded or highlighted).
In my lead-up to dipping, I've thought a lot about the mechanics of it. While many dippers actually dip, most use a brush. Actually dipping the figure, apart from getting it all over your hands, requires a lot of flicking to get rid of the excess. Too much stain and you've got a discolored blob. Having watched Steve Puffenberger dip and flick a pile of figures, I decided that's too much work and would probably give me tennis elbow or something. So I opted for brushing.
The trick while painting for the dip is to refrain, despite all temptation, to do anything more than solid colors (although highlighting is up for reconsideration in some cases). That's what speeds it up.
The method also removes detailed face-painting from the process. What to do about faces has always been my downfall. For the dip, I just use my base coat of Howard's Hues Ruddy Flesh and leave it. No sepia wash and detailed eyes. Thank goodness. My hands have never been steady and I'm already using 3x magnifiers to paint with. Any method that produces satisfactory results without painting eyeballs on 28mm figures is OK by me.
Pre-dip blocked out in solid colors
After all the colors were blocked in for the figures, I gave them a spritz of dullcote as final prep for dipping. My impression was that at this point it was an OK paint job, pretty much as when I started painting minis 40 years ago.
With the figures ready to go, I still hestated. I thought of doing one figure and seeing whether I would just ruin it. But after a few days of hestitating, I bit the bullet and went into my garage on Saturday morning with my figures, a can of Minwax Tudor stain, and a brush.
I started with an officer figure in a buff coat. The stain was thinner than I expected (I'd stirred it with a little wooden paddle for a while before brushing it on). It oozed and flowed and puddled into the nooks an crannies of the figure. It also made the detail pop amazingly. I wicked out some excess here and there using the brush and looked on what I'd done. I liked it. With my fears of ruination ameliorated, I went on to the other 13 figures.
The stain dries very glossy. On the recommendation of John of the Panzer Depot, a true dipper himself, I let the stained figures dry for 24 hours before giving them another spritz of dullcote.
The results are very satisfying. The stain darkens the colors overall--not surprisingly. Some would say that the colors become dark and grimy. I think you can counter that by the colors you use. Brighter colors stand out more, but even the darker colors are OK if you go into it understanding that the colors will be some degree darker.
First batch post-dip, post-dullcote
Thoughts on the process
I need to do a bit more wicking away of the stain puddles, I think. I might experiment with a hybrid flick 'n' wick. Even though brushing lets me control how much stain is applied, the stain still puddles like crazy.
I wonder if using a satin or even a gloss coat before dipping would reduce the darkening of the colors. I assume that dullcote has more "tooth" than gloss and therefore keeps more of the stain on its surface. The stain may repel a bit more from glossy or semi-gloss surfaces. I'll have to give it a try.
I think that for some colors that are applied on large areas, like uniform coats, a drybrushed highlight might also help make the post-dip colors brighter.
I might also tend toward lighter colors, which I could get by mixing in a drop or two of white when I'm mixing the paint. I also think that using thinned paints to get a heavy wash will self-highlight to some extent. (I use white primer, so the substrate for the wash lightens the color.)
Online resources
I've found a few places online--though I'm sure there are many more--that offer some advice about the dip:
I'm well-committed to the Thirty Years War project. I've had a large number of figures sitting around for a long time and I just acquired many more. As soon as my recent orders arrive, I'll have enough figures to do two large tercios, two units of dismounted dragoons, three heavy/medium guns, two light guns, two commanded musketeer units, and various command figures.
I've also got many more candidates for dipping. All those primed or partially painted figures imprisoned in boxes can be set free!
I have a lot of single-mounted figures for English Civil War skirmish gaming that are primed and ready. These are Renegade and Bicorne figures, which are BIG 28s (more like 30s). My plan was to do my best traditional method on them, but now I'm thinking that the dip may be the best way to go. I've completed two figures, a Royalist musketeer and a Scots musketeer to see how the dip works for them. Single figures tend to get looked at more closely, so I'm a bit more sensitive to painting them well.
Renegade ECW blocked and ready to dip
There's also the buckets of medieval figures that I have and a big, big box of 28mm Dixon American Civil War figures. (Talking with Kevin Smyth the other day, he's mentioned wanting to paint up his big box of 28mm ACW for Regimental Fire and Fury...)
So, now I've got my marching orders:
When a project comes along You must dip it Before the figures sit too long You must dip it When the paintin's goin' wrong You must dip it
We played a first game of Habet, Hoc Habet!yesterday at The Panzer Depot in Kirkland, WA. Phil Bardsley's grandson Zach was in town and wanted to game, so we decided to do something simple and quick—without, of course, factoring in our ignorance of the rules. I'd given the rules a read and thought I had the gist, but actually playing the game disabused me of that illusion.
We played "cut-throat" with each taking a single gladiator and fighting all against all. We used my big 35/40mm Jugula figures from Gripping Beast. I made some quick gladiator stat sheets yesterday morning using Adobe InDesign. We each chose a gladiator and rolled 4 x D3 to get a total of points we could use to customize our gladiators. Phil chose a Secutor, Zach chose a Retiarius, and I chose a Thracian.
For simplicity sake, the stats for the gladiators were pretty equal. Where they differed was in the weaponry. I quickly filled out the armor and weapons stats for the gladiators. The Thracian and Secutor are both sword armed, but the Secutor has a large shield and the Thracian a regular shield. Both also have full helmets, leg and arm armor. The Retiarius is mostly unarmored and has a trident and net. The net is a bit of a novelty and works a little differently than other weapons.
Habet, Hoc Habet! uses playing cards to determine the order of actions in a turn. Each gladiator got three cards and the order of play goes by ranking of the card (King - 2) and by suite (Spades-Hearts-Clubs-Diamonds) in case of ties in the ranking. Aces are an extra card that lets the holding player interrupt any action and play a free action of their own (Phil got two aces on the first turn). Jokers let the holding player re-roll and die.
Phil moved first and went after Zach's Retiarius. Zach moved towards Phil. I hung back waiting to see what would happen. Phil attacked first, but Zach's Retiarius managed to block the strike with his net. I thought at the time that the net took damage in blocking a sword cut, but I later thought I was wrong and returned the net to undamaged. I've since learned that I was right after all: nets used to block cutting weapons, like swords, receive damage equal to the hit points they block. In Phil's case, he did six points of damage to a net worth 8 points. Also, the net blocking the sword, should have deprived Phil's Secutor of his sword, which was moot after the next actions.
Zach struck at Phil next. In a very bad sequence of poor die rolls, Phil failed to block the trident thrust, which landed on his Secutor's right arm, which was armored. But then, he failed to make the saving roll to count the armor in defense. Zach managed to inflict 5 points of damage on the Secutor's right arm, which could take only 4. The attack deprived the Secutor of the use of his right arm, effectively disarming him. I've since learned that it also counts as a MIGHTY BLOW, which does more nastiness. At this point, Phil and his Secutor were hors de combat.
Now was my time to strike and I went after Zach's Retiarius. I managed to hit and Zach managed to block with his trident (his net having been damaged by Phil's Secutor). I rolled a natural "0" for my strike, which calls for a roll on the Critical hit chart. The result was that I would do double damage and cause damage to any blocking weapon/shield. The attack destroyed the Retiarius' trident, but I failed to do any further damage to the Retiarius.
Next turn, I managed to strike first but rolled a natural "1" on my to hit roll, which means a fumble. The result of that was a permanent -3 from any damage points from my sword. In response, Zach successfully netted my Thracian. In his next action, Zach wanted to attack but had no weapon, his trident being destroyed blocking my sword last turn. Instead he picked up a rock (they are, apparently plentiful in the arena) and tried to bash me. But rocks have a low damage potential and my Thracian was pretty well armored. Bash away though he tried, he couldn't do any damage.
Being netted, I could do nothing until I cut my way out with my -3 damage sword. I tried again and again, but failed to do any damage. A sword does 1 x D6 damage (now a -3 for me) and I got no possible strength bonus because I was netted. I slashed and slashed but could not cut my way out of the net.
At this point, we were at a stand-still. Zach's Retiarius could bash away to no avail at my Thracian, who could not cut himself out of the net.
My initial thoughts on Habet, Hoc Habet! were a bit morose. The game seemed awkward and didn't work as I expected, but on reflection, that may be more a matter of fumbling through rules without having a good sense of the game flow. I sat down earlier today and started writing out a flow chart of the turn sequence, especially that attack sequence, and I have a better appreciation for how the game works. It needs a second game or two to get a real sense of it. I also want to complete my remaining gladiators, so we have more types to choose from.
I also got to wondering whether the rules might not be adaptable to my Bronze Age skirmish figures. I'm still waiting for Ganesha Games to release it's ancients skirmish game and I rather fear I may be waiting for a long time. Ganesha seems to be putting a lot of their effort into other projects.
I'm just about finished with my Algoryn force for Warlord Games' Beyond the Gates of Antares. Over the past few months I've managed to bang out three regular AI squads, one AI assault squad, one AI infiltration squad, a command squad, a mag light support weapon and crew, and an x-launcher and crew. At this point I only have some spotter and targeting drones to complete, which I would do if it weren't so hot right now.
A little support from my friends
I have two support weapons and crews complete. The light mag support weapon is a kind of sci-fi version of an MMG. It has a rate of fire of 3 and a +2 strike value (the amount that a target's "resist" value is reduced).
Light mag support weapon
The x-launcher is a sci-fi mortar. It uses overhead fire and the weapon has a blast effect.
X-launcher
Each support weapon comes with just two crew. Like in Bolt Action, the weapon's effectiveness degrades as crew is lost. However, in Bolt Action, support weapons usually have three crew, so BTGOA weapons may poop out sooner.
The only missing support weapon is the plasma cannon. John hasn't gotten them in at The Panzer Depot. There was one mis-marked pack, but it's contents were the mag light support weapon. I'll have to wait until John gets another in. From the beta rules for BTGOA, it looks like there are other support weapons that Warlord hasn't released figures for, like a light plasma support.
The squaddies
I now have three regular Algoryn armored infantry (AI) squads. The Algoryn AI aren't bad. Their mag weapons are pretty effective and their +1 reflex armor, combined with their normal "resist" value of 6, gives them a 70% chance (1-7 on a D10) to survive a hit (reduced, however, by the weapon's strike value).
Each AI squad is five figures: one leader with a mag pistol, three squaddies with mag guns, and one squaddie with a micro x-launcher, which is a hand-held version of the support weapon, except that it can use direct fire at effective and long ranges (up to 30"). The leader figure also carries an x-slinger, which is a very short range version of the x-launcher.
AI advance!
The command squad is three figures all armed with plasma carbines. Plasma carbines have a slightly shorter extreme range than mag guns, but a +2 strike value. They can alternately shoot "scatter" at an increased rate of fire (RF=2), but their strike value goes down to +0. The command squad also includes a targeting drone, which increases their chance to hit.
Command squad
Targeting drones are part of some unit's composition (support weapons, command squads, and special types).
My favorite new unit is the assault squad. These have mag repeaters, which means a higher rate of fire than a mag gun, but no extreme range and a strike value of +0. What makes the assault squad tough is the "d-spinners" that they use for close combat. The weapon has two attacks (two dice per figure) at a +2 strike value, but it also distorts the effect of weapons used against them, giving a +2 to their "resist" value in close combat.
D-spinners ready
Chicks in reflex armor
The background story for BTGOA says that Algoryn infiltration squads are made up of women fighters only. They're not much different in games terms than a standard Algoryn AI squad, except that they have MAG repeaters for weapons, like the assault squad, and include two targeting drones (which increase their hit probability).
Infiltration squad w/o drones
I gave them darker blue armor with metallic blue chest and shoulder plates. I also gave them pink unit patches. Their armor is less bulky than for the male squaddies. It's kind of the sci-fi equivalent of a chick-in-chainmail that you find in fantasy figures. The armor is more form fitting and shows off their rear ends better than standard armor.
Lt. Shapley Bottoms leads the troops
I try pretty hard not to be stupid every day, but some days are better than others. It wasn't until I got to painting the weapons for the unit that I noticed I had assembled one figure with its weapon held upside down and backwards. Well, crap.
Kids, don't hold your MAG repeater like this at home
What's next?
I still need to get a plasma cannon to complete my Algoryn force. After that, I'll likely start some Concord troops as an opposing force. There are apparently people who play/have played/will play BTGOA at The Panzer Depot, but I haven't crossed paths with them. I do have plans to get a small sample game in later this month with Phil Bardsley, when we'll also give my 35/40mm gladiators their baptism of sand.
The BTGOA rules haven't been released and are only available in a free PDF, which has been supplemented with several smaller PDFs with additional rules. The rumor I hear from John Kennedy is that Warlord Games will release BTGOA in December this year. They've been working hard on having an initial release available of multiple races/polities for the system. So far, Algoryn, Concord, and Boromites are available, but previews from the Warlord website shows more in the works.