As I've posted, I'm a sudden—and fervent—fan of the Tribal rules published by Mana Press in Australia (also available from North Star Military Figures in the UK and Badger Games in the US). It’s my current obsession (mon obsession actuelle).
I bought the first edition rules in PDF format some years ago (pre-plague) in order to evaluate them for use with my 40mm Bronze Age Europeans. I didn't go with them at the time (not sure why) and the rules languished as 1s and 0s on my hard drive for a long time. They came back to mind when someone in our club asked on a forum about a good set of rules to use with some Pacific Northwest tribal figures he bought. That caused me to go back and dust off (so to speak) my digital copy of Tribal. I also watched some old vids on YouTube that went through some of the game mechanics of Tribal.
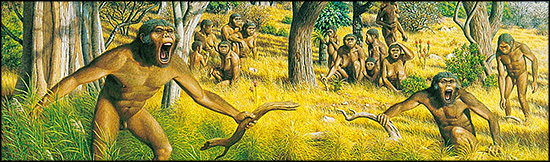
Tribal touches one of my strange enthusiasms as a gamer: I like obscure prehistoric things or at least obscure archaic things, things that never make it onto the radar screens of most gamers, like the fabled Medieval Lithuanian bat-dung hurlers or the left-handed Bratislavian fire-dart flingers. That's why I have Sumerians, for example. They're obscure and archaic. No one games with Sumerians. It's like people don't even care. Even though Tribal can be used for any era of pre-gunpowder gaming—the first edition focused on Vikings as one example—they really excel for gaming warfare between pre-civilised cultures, going as far back as the Paleolithic Age. The Primeval supplement for the first edition even contains rules for playing with bands of Australopithecines who haven't yet invented scissors or paper and are only vaguely aware of rock, which they're beginning to suspect beats everything.
I played my first game, using the aforementioned Bronze Age Europeans, at Zulu's Games in lovely renascent Bothell, WA. Wes Rogers was my opponent; he's usually up for anything at least once. We even went back in time together to play Dave Millward's Musketeer rules a few years ago. I like time travel when it comes to wargame rules.
We used the first edition rules. I'd ordered the second edition rules already, but hadn't yet received them. In fact, it turns out I'd ordered three copies. I originally ordered them from North Star, but got to thinking that shipping from the UK will take a while, so I also ordered them from Badger Games here in the US. Badger Games is often extraordinary in its speed of delivery, but for some reason took its time with this order. My North Star order arrived first and, to my surprise, was two copies of the rules. (I thought I'd ordered just one, but I'm older now and more prone to being unaware of the things I do.) When the Badger order ultimately arrived, I found myself awash in rule booklets. No worries. I have one copy to keep pristine, one to play with, and one to lose or get barfed on by a cat.
When I received the second edition rules, I was eager to see what was new and what changed. As for the latter, nothing. The intent of the authors was that the second edition would add to the first, not replace it or override it even in part. The real joy with second edition is in what it added. The first edition made me want to get more out of my collection of Bronze Age Europeans. I wanted the armor worn by some figures to mean something. I wanted their standard bearers to have some meaningful role. I wanted to be able to use my chariot and other mounted figures. Second edition has all that and more.
The basics
Tribal uses playing cards for all the important stuff: Initiative, activation, movement, range estimation, shooting, combat, and other things that you'd normally do with dice, chits, measuring devices, rochambeau, or bare knuckles.
The only other miniatures game I've played that uses standard playing cards is Pig Wars. Cards make for an interesting dynamic. The following odds keep changing with every card you play. This is one of the things that makes Tribal unpredictable. Needing to roll a 6 is one kind of challenge; needing to win a round of combat with a bad hand of cards is another. Playing a round of combat is like a hand of hearts or euchre where you’re judiciously playing your low cards and high cards to maximize the effect of winning a trick or minimize the effect of losing one and hopefully come out the winner overall.
A warband in Tribal consists of roughly 20 to 30 figures that are organized into units that can be formations of five warriors or a single figure representing a character (a hero or the warlord). Characters can take a number of wounds, usually five, before they're gone. The warlord can take six wounds and there's one veteran skill (Tough) that adds an extra wound. A warlord with the Tough skill could take seven wounds before he's pushing up the daisies. Dice can come into the game as markers to indicate a character's remaining wounds.
Units, skills, and historical special rules are bought using honor points, which are the key factor in winning (or losing) a game of Tribal. The warlord is free; other units cost one point. Veteran skills cost one point and elite skills cost two. Historical special rules vary in cost.
Units can be armed with short weapons (clubs, swords, rolling pins, the fearsome wooden spoon your mother wielded), long weapons (spears, poleaxes, broom handles, very long swords), or ranged weapons (bows and arrows, javelins, slings, rocks, playing cards). In hand-to-hand combat, how a unit is armed affects the cards they play. Clubs give a +1 preferred weapon bonus to short weapons, Spades give a +1 preferred weapon bonus to long weapons. Missile units, called marksmen, don't have a preferred weapon, but still fight better than in first edition, where they were dog-meat if charged.
At the start of a turn, you draw a card for every unit and assign a card to each. These are activation cards. A unit can activate if it has a card. Cards are used when you activate a unit to move, charge, or shoot. They're also used if you're the target of a charge or shooting.
The value of the activation card is important only in that you'll include that card as the first card jof the combat hand you draw for hand-to-hand combat. It's also the card you’d use to defend yourself when shot at by an opposing marksmen unit. It's something to keep in mind when you assign initiative cards to your units.
Initiative for a turn is decided by drawing a single card from your deck. The higher card goes first. The card drawn for initiative is also counted as one of the activation cards you draw for your units. (Cards are reused as much as possible.) After that, players alternate activating their units until there are none left to activate.
Movement uses card widths and card lengths as units of measure. Typically, units make a march move of one card length. The card is placed in front of a figure and then the figure is moved to the other side of the card, which means that the actual distance is a card length plus the figure's base depth.
On top of that, even though the rules don't explicitly say so, the YouTube videos produced by Mana Press to demonstrate game play make clear that only one figure in a formation needs to be measured by the card length move; the remaining figures just need to conform to the one figure in order to maintain coherency, which means that all figures of a unit must have some bit of their base under a single card.
Sprint moves are two march moves back to back. A walk is a move measured by the card width. Units in bad going can only walk.
Hand-to-hand combat is initiated by charging into contact with an opposing unit. Once in contact, opposing units draw a combat hand of a number of cards equal to the number of figures in a formation or the number of remaining wounds for a character. The opposing troops will then fight a combat round that consists of a number of exchanges equal to the larger of the two combat decks to a maximum of five exchanges. Units that can have more than five cards in their combat deck get the advantage of having more cards to choose from in an exchange.
For example, a formation of four warriors with short weapons charges a hero with a long weapon who has three wounds remaining. The warriors start with their activation card and draw three more cards from their deck for a total deck of four. The hero hasn't activated yet, so he draws two cards from his deck and adds his unused activation card for a deck of three. The combat round will consist of four exchanges.
In an exchange, black cards (Clubs and Spades) are strike cards which can cause a wound if they win. Red cards (Hearts and Diamonds) are feint cards, which are defensive only, but if they win, they can change the suit of one of the cards played in the next exchange.
Continuing the previous example, the warriors had a 10 Spades as their activation card and draw J Diamonds, 3 Hearts, and 5 Clubs as their deck. The hero has a 7 Clubs as his unused activation card and draws a 4 Spades, and a red Joker. Jokers are The Bomb.
First exchange - Because the warriors charged, the hero plays the first card in the first exchange. He plays the 7 Clubs, a strike card, but gets no bonus because he has a long weapon. If he could play a Spade, he'd get +1 to the card value. The warriors play their 10 Spades and also receive no bonus, but win the exchange. Because Spades are strike cards, the hero will suffer a wound, bringing him down to two wounds remaining.
Note that if the warriors, because they're armed with short weapons, had doubled the hero's card's value, they would have inflicted two wounds. If armed with long weapons, they would need to have tripled the opposing card's value to inflict two wounds.
Second exchange - The warriors still have the advantage because they just won an exchange. The hero again plays first. Feeling a bit desperate, he plays his red Joker, which he can name as either red suit. He chooses Diamonds. The warriors play their 3 Hearts. The hero wins the exchange, but because he won with a red card, no wound is inflicted on the warriors. However, because he won with a Diamond, he can change the suit of the warriors' card in the next exchange, i.e., if the warriors play a Club, which would give a +1 bonus and inflict a wound if the exchange is won, the hero can change it to a Heart or Diamond, which inflicts no wound and gets no preferred weapon bonus.
Third exchange - The hero has the advantage now and the warriors have to play the first card in the exchange. They play their J Diamonds. The hero, who can only play his last card, 4 Spades, changes the warriors' Diamonds to Hearts. The warriors win, but inflict no wounds, and are now at 2 exchanges to 1 against the hero. Also, because the hero changed the warrior's suit to Hearts, the warriors can change the suit of their own card in the next exchange.
Fourth exchange - The warriors regain the advantage, so the hero must play first, but he has no cards. This means that he has to draw a Panic card from his deck. Panic cards can win an exchange, but can't cause a wound regardless of their suit. It's a desperation move. The hero draws a 4 Spades and gets a +1 bonus because he has a long weapon. The warriors play their remaining card, a 5 Clubs. They too get a +1 bonus because they have short weapons. At 6 to 5, the warriors win the exchange and cause another wound to the hero, who's now down to one wound remaining.
The combat round is over, the warriors have won three exchanges to the hero's one and they win the round. The warriors have had no losses; the hero has suffered two wounds. The warriors receive one honor point from the central supply and the hero has to retreat a march move away.
Alternate fourth exchange - If the warriors had a 5 Spades instead of Clubs, the round would have ended differently. The warriors wouldn't get a +1 preferred weapon bonus, so the score for the exchange would be 5 to 5, a tie. Long weapons win ties, so the warriors would lose the exchange, but suffer no wound because the hero played a Panic card. The round would end with two exchanges for the warriors and two for the hero, another tie, which the hero, with his long weapon, would win.
Ranged combat is simpler and shooters are more robust in second edition. There's no range limitation due to what is assumed to be the close-in nature of the fighting; however, a marksman unit must have line of sight and can't shoot through other units, friend or foe. The marksmen discard their activation card, draw a card from their deck, and compare it to the target unit's activation card, if it hasn't activated yet, or to a card the target draws from its deck. If the marksmen's card is higher than the target's, the target takes a wound. If the marksmen's card is double the value of the target's card, the target takes two wounds.
In the first edition of the rules, ranged combat was an optional rule. Also, instead of discarding their activation card and drawing from their deck, marksmen used their activation card. The difference is that previously, a player unit could assign a high-value activation card to a marksmen unit and be assured of a high likelihood of inflicting a wound (or two). In the second edition rules, it's more random.
Whether or not the marksmen can inflict wounds on their target, they have a great value in causing a target unit to use up its activation card.
Honor points are the heart and soul of a game. Regardless of losses, a game is won by the side that has the most honor points at the end. A player who runs out of honor points during the game loses. This is why retaining some amount of honor points is good game sense.
A player receives honor points from the central supply whenever they win a round of combat. They also receive an honor point from their opponent's pool as blood payment when they completely destroy a unit—in most circumstances. If a unit is destroyed by ranged combat, the owning player must make the blood payment to the central supply, not to the opposing player. There’s no honor in destroying your enemy at a distance.
Players also receive honor points as a result of scenario objectives. These are typically counted after the game ends.
Second edition
Apart from the change to ranged combat—moving it from being an optional rule to a main rule—the outline above is no different from the first edition rules. What's new in second edition is the addition of other rules that provide more variables and nuance to the game.
Armor - When I read the first edition rules, I wondered how I could retrofit some kind of armor rule so that my guys in cuirasses and helmets could benefit from the protection. I need wonder no more. Second edition includes rules for buying light armor (1 honor point) or heavy armor (2 honor points). Both allow a unit suffering a wound to draw a card to nullify it. Light armor works on Jacks or higher, heavy armor on 8 or higher. Only characters can have heavy armor.
Cavalry - Formations or characters can be mounted on horseback. Their only advantage is faster movement. They get no benefit from fighting mounted against units on foot. Cavalry moves at twice the rate of foot units: a walk is two moves at half a card distance, etc. A sprint, two march moves for foot, is four for cavalry. You can cover a lot of tabletop—as long as it's good going. Rough going reduces their speed to a walk, which is still two walk moves for them.
Cavalry can dismount at the start of any activation, but once dismounted, they may not remount.
Chariots - Only characters can be mounted in a chariot. Chariots are a lot like cavalry, but are restricted to making a single turn (pivot, really) at the beginning of their move. Chariots can also only move in good going. Like cavalry, their moves are doubled. They do have one advantage in hand-to-hand combat, however. If they march or sprint into contact, they get an extra card for the battle hand. Note, however, that if they sprint into combat, their opponent also gets an extra card for their battle hand.
Like cavalry, characters in a chariot can dismount at the start of their activation and must remain on foot thereafter.
Standards - The skill is actually called Rally Around the Flag, but it gives you some value for your standard bearer types, which are normally useless in a skirmish game. Only a hero can be given the skill and it costs nothing. The advantage is that any friendly unit within two card lengths can never lose a round of combat. Instead any opponent who wins a combat round must retreat a march move away and no honor point is awarded for the win. It can make for a tough going. However, losing the standard costs 5 honor points that are taken from the owning player's pool at the end of the game.
And the rest - Like the short shrift the professor and Mary Ann got on Gilligan's island, I won't go into more of the historical special rules. They can add a lot of flavor for the types of things they model. Those called out above are, in my opinion, the ones that matter most to me given the types of figures I have to play Tribal with.
Optional rules
Second edition moved shooting to the main rules, but card pools and dirty tricks are still there.
Card pools provide a reserve of five cards dealt from their deck at the beginning of the game that players can resort to to achieve a better result in combat or to replace an activation card that was used up when a unit was the target of a ranged attack or charge.
For example, a unit of marksmen that hasn't activated yet is charged by a unit of warriors. The round of combat ends with the marksmen reduced, but still alive. They lose their activation card because of being charged (it become one of the cards in their battle hand), but in their turn, they can use a card from their draw deck to activate for shooting and dish some out to the unit that just attacked them. Note, however, that units that have already activated can't use a card from the card pool to activate a second time.
Dirty tricks are something you can resort to when the chips are down, but it will cost your honor. At the start of a round of combat, after the battle hands are dealt, a character can take up to four honor points from their pool and devote them to the combat. They can spend a point to nullify a wound or to change the value on a card played in an exchange. However, even if you don't use them all in a combat, all the honor points allocated go back the the central supply. It's a drastic thing to do, but it may be worth it if you need to ensure that the character survives a fight.
Gunpowder
To represent colonial forces clashing with tribal warriors, or just the effect of modern technology used by tribal people, the second addition provides rules for musket-armed formations. This is one of the biggest additions to the rules. Shooting from muskets can be much more devastating than normal ranged combat because you draw one card per figure in the unit firing. It's theoretically possible to drop a whole 5-figure formation in one go, but you'd have to be pretty lucky.
It costs one honor point to arn a unit with muskets. When muskets fire, the owning player draws one card from his deck for each figure in the firing unit. On a Jack (11) or higher, a wound is inflicted. There are some modifiers that affect that; for example, if the target's in cover, a wound is score on Queen (12) or higher. Being within two card lengths improves the shooting to needing 10 or higher.
Unlike ranged combat with marksmen, it seems that units with muskets can move and fire. While the rules don't specifically state that's the case, there is a -1 penalty for walking and shooting and a -2 penalty for marching and shooting. If you sprint, you can't shoot.
Also unlike normal ranged combat, the target of musket fire can elect to leg it—i.e., skedaddle—when the shooting is declared and before cards are drawn. It's a -1 then to the shooter's cards.
Musket armed troops also have to reload after shooting by spending an entire activation doing nothing, which can be disrupted if they're shot at by marksmen or charged before they can activate.
In hand-to-hand combat, a unit with muskets counts as having long weapons. However, if I was playing with North American Indians with muskets for the French and Indian war, for example, I'd be inclined to count them as short weapons to better represent warriors with tomahawks.
Scenario building
The first edition of Tribal and its supplements Primeval and Brutal provided scenarios to play. Second edition doesn't provide any pre-baked scenarios, but does provide a system to generate game objectives in the section "Matter of Honour" (pp 27-33).
Players first decide on the size of the playing area, how many turns in the game, how many honor points in the players' pools, and set out terrain.
Then each player sets out their game markers. These are new to second edition. Each warband should have two markers, one that represents a person and one that represents an item. I have no question about the person markers for my Bronze Age Europeans:
I'm figuring out the item bit. Skulls perhaps...
Now players draw a pre-agreed number of cards (1-3) from a separate deck (i.e., not their own). The cards they draw indicate what their objectives are (which they keep secret from their opponent). The suits determine the nature of the objective. Clubs involve taking or defending terrain; Hearts involve interacting in some way with a person (the person marker); Spades involve destroying a formation, hero, or warlord; and Diamonds involve interacting in some way with loot (the item marker). Jokers are an interesting case. The red Joker requires the player to escape by getting as many of his units off the opposite side of the table. The black Joker requires the player to get his entire force killed (no fratricide or suicide allowed).
If drawing more than one objective card, it's possible that your objectives can conflict or duplicate. In those cases, discard one of the cards. Note that the objectives for Jokers override all others and no honor points can be gained from other objective cards.
Achieving an objective earns honor points that count toward victory—except that achieving the objective of getting all your units killed is an instant win. But players have to keep in mind that if they ever get to zero honor points in their pool during the game, they lose. Honor is everything!
Projects ho!
Getting psyched about Tribal has birthed a few projects, which I'll recount in detail in future posts as they bear fruit. My initial figures on hand to play Tribal with are my beloved 40mm prehistoric Europeans (i.e., Bronze Age) that were produced back in the day by Monolith Designs / Graven Images. I have enough to create two good-sized warbands with heroes and other goodies (cavalry, chariots, shaman, etc.) In addition, I have the following projects in the works or staged for starting:
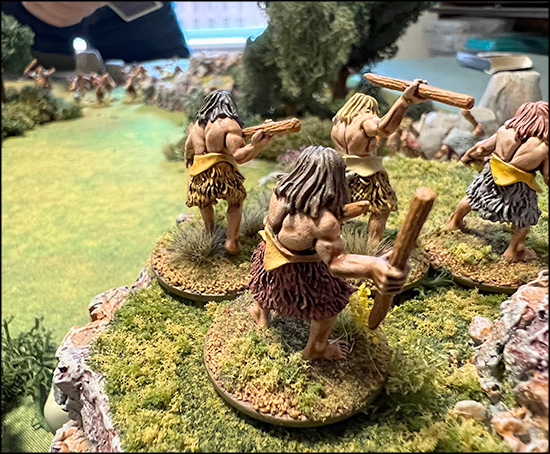
Cavemen - As I'll relate in a follow-up post, I'm crazy about the Bobby Jackson-sculpted cavemen minis from North Star. They're excellent figures and were designed specifically to create a warband for Tribal. I've supplemented these figures with some of the Neanderthal minis produced by Lucid Eye for their Savage Core range. Despite being done by a different sculptor (Steve Saleh) they mix 'n' match with the North Star cavemen perfectly.
Mudmen of New Guinea - Bob Murch of Pulp Figures released a pack of Asaro mudmen for his Savage Seas range. It's just one pack, but there are a variety of weapons possible (long and short), a bow-armed figure, and 15 varieties of their mud helmet. Also, being completely covered in mud, the minis won't be hard to paint. I also bought some Melanesians from the same range to be an opposition force.
Mycenaeans - Many years ago (1990s) I bought a bunch of Mycenaeans from Wargames Foundry. They're wonderful mins. I painted some, but mostly not. I ordered some more from WF and now have enough for two reasonably-sized warbands for Tribal. I'll order some chariots later so I can get the warlords properly done. Hector, Achilles, Agamemnon, etc. can't just walk into battle.
Saga retreads - My group plays a lot of Saga. Those armies, all singly mounted, can easily be resorted ad hoc into a Tribal warband. There are limits, I think, to trying to adapt too much to Tribal. As long as you don't try to recreate the Saga troop types, you're good. But if you wanted to use a mounted Norman knight, you'd spend a considerable amount of honor points to buy him: 1 point for the character, 1 point for upgrade to cavalry, 2 points to give heavy armor. That's 4 points before buying any other skills.
You could make marksmen cavalry if you wanted to represent horse archers or jinetes. There's no restriction to shooting mounted (i.e., the rules don't say you can't), but marksmen can't move and shoot. However, Tribal is friendly to house rules. You could let mounted marksmen move and shoot with a -1 to their shot for march moves, -2 for sprint moves. Mounted slingers? I don't think so, but consider this.
Multiplayer games
I haven't seen anything about playing Tribal with more than one player on a side, but it works. Our most recent game was two against two. The warbands were moderate (each was two warriors, one marksmen, two heroes, plus the warlord). I was the only player who knew the rules (and I only sort of—I assumed first edition rules in some places, like ranged combat). The other players picked up the basics quickly.
To do a multiplayer game, each player has his own deck, the initiative draw decides the order in which players go for the turn. Four players was easy to manage. I'm not sure if getting six players in a game will mean a lot of waiting for your turn to coma around.
Overall impression
I love Tribal. I'm trying to be its apostle and get the locals exposed to playing it. I'm not sure why it didn't catch on with me years ago when I got the first edition rules, but I was hooked after playing my first game using first edition. Now that I have and have played second edition, I'm even more hooked—as you might be able to tell from the amount of projects I have in line for painting Tribal warbands.
The game is stylized, but not weirdly so. I have my doubts that primitive people divided their available forces into guys with long weapons and guys with short weapons, but the distinction between weapon types works for the rules. Also, the authors note (p. 9) that for the sake of aesthetics, mixed units are OK. You just mix them with a preponderance of one type over the other and declare the preferred weapon on that basis. The rules say to keep that distinction throughout by removing losses in such a way that the preferred weapon remains the majority. I kind of like the idea of making it dynamic so that as the ratio of figures changes through losses (either player's choice or decided randomly), the preferred weapon may change too.
That's another impression of the rules: They're versatile and open to tinkering and house rules, especially where there's an ambiguity. I asked on the Tribal FB page about how to resolve a duelling "Rally Around the Flag" situation. As I noted above, this rule means that if you have a standard bearer, any unit within two card lengths of the standard can't lose a combat round. Even if the opponent has won the majority (or even all) of the exchanges, they're forced to retreat if your unit isn't destroyed and they get no honor point for winning in any case. That said, if two such units fight each other, how do you resolve it if neither can lose? Ara Harwood, one of the authors of Tribal, suggested that both retreat. I replied that I liked the idea of them fighting to the death by playing as many additional rounds as needed until one unit ceases to be. Ara said he liked that and might do it that way himself.
Disclosure: Not a paid shill
In closing, lest my ardent advocacy for Tribal be construed as mercenary interest, I must state that I receive no remuneration in cash or kind from Mana Press for my hearty endorsement of their product. It's purely done for love of the rules.
And also so that I might encourage the locals and have someone in my area to play it with.