On Saturday, we played another game of John Kennedy's home-made modern version of the Kampgruppe Commander rules at the Panzer Depot in Kirkland, WA. With the first of my Bundeswehr units completed, I was eager to get them in a game too see whether they had a viable life as a wargame force or whether they would fail utterly and be cursed forever. I'll save you the suspense: they'll be fine.
The scenario was yet another wee Red juggernaut aimed at the heart of decadent bourgeois society. It was a bit bigger and badder than last game, though. Plus, there was artillery. The Soviets had the following:
T-80 Tank Regiment
1 bn – 6 x T-80
2 bn – 6 x T-80
3 bn – 6 x T-80
4 bn – 9 x BMP-1/mech inf w/1 x 120mm mortar
Recon – 1 x BDRM-2, 1 x BMP-R
T-64 Tank Regiment
1 bn – 6 x T-64BV
2 bn – 6 x T-64BV
3 bn – 6x T-64BV
4 bn – 9 x BMP-1/mech inf w/1 x 120mm mortar
Recon – 1 x BDRM-2, 1 x BMP-R
Motor Rife Regiment
1 bn – 9 x BTR-70/mech inf w/1 x 120mm mortar
2 bn – 9 x BTR-70/mech inf w/1 x 120mm mortar
3 bn – 9 x BTR-70/mech inf w/1 x 120mm mortar
4 bn – 9 x T-64BV (as 3-tank companies attached to infantry battalions)
AT unit – 2 x BRDM-2 "Konkurs" w/AT-5 Spandrel
Recon – 1 x BDRM-2, 1 x BMP-R
Assets: 3 x AT-4 Spigot
Each regiment also had a battalion of 122mm guns attached. The two tank regiments started on board with the MRR coming up later as a follow-on force.
Facing this was an initial force of American and West German units:
US combat team
1 company – 3 x M1 Abrams
2 company – 3 x M2 Bradley/mech infantry
3 company – 3 x M2 Bradley/mech infantry
4 company – 1 x M106 4.2” SP mortar
5 company – 2 x M901 ITV
Recon platoon – 1 x M3 Bradley CFV
Assets: 2 x Dragon ATGM
West German combat team
1 company – 3 x Leopard 2
2 company – 3 x Leopard 2
3 company – 4 x Marder IFV/panzergrenadiers (w/Milan ATGMs)
4 company – 1 x Panzermörser SP 120mm mortar
5 company – 2 x Jaguar-1 Racketenjagdpanzer
Recon company – 2 x Panzerspähwagen Luchs
The game was played along the length of a 5' x 12' board (6km x 14km in game scale). The NATO allies started as hidden units at the halfway point. The Soviet objective was to get two battalions of any kind across the river situated about three feet behind the NATO starting positions.
 |
| Hide and seek |
Following the recon, Jerry Tyer on the Soviet left lead the T-64 regiment against me. Ken Kissiling, on the right, led the T-80 regiment against Steve Puffenberger's Americans.
 |
| T-64s swarm the bucolic German countryside looking for trouble |
 |
| Ken's BMPs advance along a roadway with T-80s on the flank |
Ivan came on strong and vigorously scouted positions that contained numbered blinds. Ken ran his recon unit around a hedgerow and exposed Steve's M1s and M3 CFV. He followed this up by swarming in with his T-80s and soon, Steve's M1s were in full retreat.
Meanwhile, Jerry was aggressively pushing his tanks over the ford against an unseen enemy who was calling in artillery strikes to try and break things up.
This inaugurated our use of John's new artillery rules for the moderns. In the standard game, off-board artillery is simply a fire value (the % chance for a hit) and you throw a set number of dice, usually four, to get results. In the new rules, there are multiple steps that randomly determine fire value and intensity (the number of dice). It felt a little like rubbing your tummy and patting your head at first, but after a few turns we had it down. Although we dropped trying to use any modifiers, which can affect both fire value and intensity. We all agreed that we like these artillery rules better than in the standard WW2 game.
The high-explosive fun ended after Jerry pushed his recon unit up to my position. My ambush shot on him was ineffective and after getting shot at by too many T-64s, the Panzerspähwagens ran back to temporarily better ground.
After my Luchs (Luchsen?) scooted away. I engaged Jerry's oncoming Bolshevik hordes with a company of Leopard 2s and the raketenjagdpanzer company.
At the same time, my Luchsen was hiding behind another hedgerow where it could call more fire down on Jerry's tanks.
The engagement ecevtually got the better of two of Jerry's tank battalions. The rules give Soviet units good armor penetration and good protection, but they can't hit much that's far away. The shooting has five range bands: 6", 12", 18", 24", 30", 36". Russians can only shoot out to the 24" band and have only a 10% chance of hitting at that range. At the same range, my Leopards had a 60% chance of hitting, which allowed my to double my shots while halving my odds (six shots at 30% instead of three at 60%). The Soviet tanks in the scenario also had AT-8 Songster missiles, but the Leopard 2's Chobham-style composite armor give it the advantage in defending against ATGMs.
Even though the Russians took a beating, the modern rules allow them to keep advancing while in a shaken morale state, which normally prevents a unit from moving closer to a known enemy. We also increased the number of morale failures required before a unit has to retreat for Soviet units. In addition, I gave the Russians fairly high morale (Communist ardor?) in the scenario because I wanted to ensure that they kept coming on like zombies in some B-movie. It may have been too much, but several Soviet units did break into involuntary retreat after taking a lot of hits.
While my tanks were engaged with Jerry's tanks, he moved his BMP/mech infantry up to the woods in an attempt to get in close and assault the Leopards with his infantry. I would not have survived that fight.
Steve had pulled back and was holding a defensive line from the larger town, Hannahsheim (in honor of Paul Hannah who loaned us his 1/300th scale scratch-built buildings) and the fields around it.
With his M1s forced to retreat earlier in the game, Steve only had the Bradley companies and his ITVs to hold off the inexorable swarm of T-80s. Even though he sent Ken's tanks back a few times, they just rallied and came back, fewer in numbers, but just as determined.
At this time, the follow on motor rifle regiment appeared. This was a lot of troops and looked impressive rolling along the autobahn.
Up to this point, I had been following my philosophy that on defense, it's better to be shot at and return fire than to initiate a firefight and let the opponent fire back with everything he's got. This is especially true with the way we set up ATGMs for non-antitank units. Because they aren't tank-hunters, we don't let IFVs that have ATGMs fire as an action in their own bound. Instead, they can only fire in reaction within their reaction range (16"). This emulates tactical doctrine and, from a purely game perspective, eliminates the phenomenon of flights of Spandrel missiles obliterating targets 40" away (4km in game scale, which is the max range of most ATGMs by 1985).
That being said, I got cheeky and wanted to take out some tanks. In response, I got my Jaguar units shot up and forced to retreat.
With Steve pulling back on my left, the Leopards in the woods were in a tough state and soon to be cut off if I didn't move them. I made one attempt in my bound, but failed to pass the check to see if my tanks could move through the woods. It wasn't until John (taking over from Jerry) shot at me that I could respond by making a voluntary retreat, which took me way back beyond the smaller town, Paulshausen, and another wood.
With my forward company of Leopards forced back and my raketenjagdpanzer (I love that word) unit shot up, I had only the company of Leopards in Paulshausen to hold the line.
At this point, Steve decided to fall back beyond the river to rally and recover.
Steve's manouver betrayal left my flank wide open but it also triggered the arrival of a reinforcement team:
1 company – 3 x M60
2 company – 3 x M60
3 company – 3 x M2 Bradley/mech inf.
4 company – 1 x M106 4.2” SP mortar
5 company – 2 x M901 ITV
Assets: 1 x Dragon ATGM
This was a bit of a hollow legion. The ITVs were potent, but the venerable M60 Patton had seen its day by 1985. Its 105mm gun was the same as the one on the M1 Abrams, but the armor was old school. Not quite adequate to defend against Soviet tank rounds, the armor was useless against ATGMs.
While the NATO reinforcements were still in column, Ken threw the might of the motor rifle regiment at my one company of panzergrenadiers holding Paulshausen. I hoped that my troops would hold, given that they were in excellent cover and had lots of Milan missiles to shoot. Nevertheless, I lost half the unit and the remainder was forced to retreat. My Leopards that were also in the town, got shot up anf forced to retreat as well. This left Paulshausen wide open to the Bolshies.
My On my next turn, I ran the only units I could into the town: the M60s. This wouldn't normally be a wise move. It wasn't this time, either. I should have pulled back and given my tanks a nice field of fire to defend the bridge. Tanks don't do well in close combat with infantry—especially infantry liberally supplied with RPG-7s. Even if I rolled well, I couldn't shoot them up enough to prevent them from coming in—and my shooting was desultory at best. The company was completely destroyed.
On my next bound, I withdrew the other M60 unit from the town and pulled back in a line facing it.
Now the Soviets moved into Paulshausen and in the area around it.
Steve, having sufficiently licked his wounds, came back across the river and took up improved positions to stop the Red Menace from getting any farther.
I had recovered my beloved raketenjagdpanzer unit and had been exchanging shots with John's remaining T-64 battalion. I also brought up the ITVs alongside to prevent any resurgence along Jerry/John's axis of attack. I might not have worried too much, although it was a full battalion and could have done some harm had it worked around.
By now we called it. It was nearly 7:00 PM and we'd been playing since noon with a short lunch break around 2:30. The time seemed to fly and we have no idea how many turns we played. With the KGC time scale of one turn being 30-45 minutes, we must have been fighting in the dark for the last few turns.
Post mortem
The modern rules are really shaping up. Despite the novelty of some of the mechanics, there seems to be a better flow of the game than with the WW2 version.
The Soviet tank fire is anemic in it's ability to hit, but when it hits it can cause some damage. Even then, at one point, John started firing HE at my Leopards because he had a better chance to hit and could inflict damage on me if I rolled "10s" for my armor saves (which I have a talent for doing). Right now, the formula gives the Soviets about 50% of the hit chance for the NATO troops. This reflects loading times, ammunition, and sighting equipment. We might need to revisit that and perhaps bump it up a notch.
I gave the NATO better commanders, but just slightly better. I think I should have made the Soviets a "0" or even a "-1". Soviet tactical doctrine called for masses of tanks and troops. A Soviet tank regiment is not something that needs to be wielded skillfully. Just mass it and bring it on. They don't need a lot of command pips to that. Even a -1 commander can get one pip per turn at worst and four at best.
I made the Soviets 8 morale and the NATO 7. I think I should have made the Soviets lower. At least a 7, maybe a 6. The modern rules let them keep coming on despite being shaken. By giving them 8 morale, they were too hard to delay.
By next game, John may have a draft of the helicopter and airpower rules. I hope to have my PAH-1s ready to go. I'm currently painting Gepards, Rolands, and Stinger teams.
 |
| T-80s get the better of a company of Abrams |
Meanwhile, Jerry was aggressively pushing his tanks over the ford against an unseen enemy who was calling in artillery strikes to try and break things up.
 |
| T-64s fording under fire |
The high-explosive fun ended after Jerry pushed his recon unit up to my position. My ambush shot on him was ineffective and after getting shot at by too many T-64s, the Panzerspähwagens ran back to temporarily better ground.
 |
| Look! Luchs |
 |
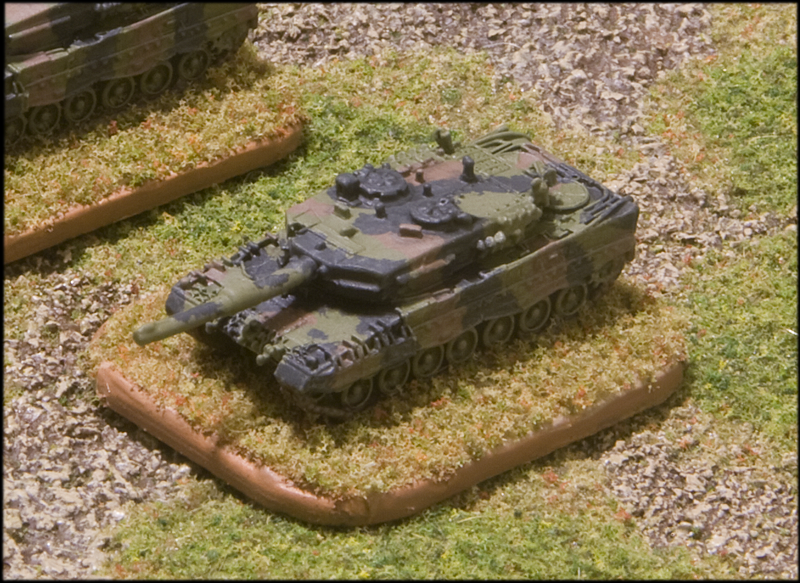
| Overwatch: Leopard 2s on the hills above Hannahsheim |
 |
| Does it ever feel like all of Mother Russia is in your face? |
Even though the Russians took a beating, the modern rules allow them to keep advancing while in a shaken morale state, which normally prevents a unit from moving closer to a known enemy. We also increased the number of morale failures required before a unit has to retreat for Soviet units. In addition, I gave the Russians fairly high morale (Communist ardor?) in the scenario because I wanted to ensure that they kept coming on like zombies in some B-movie. It may have been too much, but several Soviet units did break into involuntary retreat after taking a lot of hits.
While my tanks were engaged with Jerry's tanks, he moved his BMP/mech infantry up to the woods in an attempt to get in close and assault the Leopards with his infantry. I would not have survived that fight.
 |
| BMPs on the ridge moving against the Leopards in the woods |
 |
| ITVs and Bradleys hold the line at Hannahsheim |
 |
| More Bradleys take cover in the fields |
 |
| Hannahsheim has fallen to the Red Swarm! |
 |
| Just the lead of three more battalions rolling in |
 |
| More T-64s and mech infantry (with missiles) missiles come on |
That being said, I got cheeky and wanted to take out some tanks. In response, I got my Jaguar units shot up and forced to retreat.
 |
| Scheiß! Mein raketenjagdpanzer is kapautt! |
With my forward company of Leopards forced back and my raketenjagdpanzer (I love that word) unit shot up, I had only the company of Leopards in Paulshausen to hold the line.
 |
| Defending democracy in Paulshausen |
 |
| My false allies in retreat |
1 company – 3 x M60
2 company – 3 x M60
3 company – 3 x M2 Bradley/mech inf.
4 company – 1 x M106 4.2” SP mortar
5 company – 2 x M901 ITV
Assets: 1 x Dragon ATGM
 |
| M60s: Great tanks—in 1961! |
While the NATO reinforcements were still in column, Ken threw the might of the motor rifle regiment at my one company of panzergrenadiers holding Paulshausen. I hoped that my troops would hold, given that they were in excellent cover and had lots of Milan missiles to shoot. Nevertheless, I lost half the unit and the remainder was forced to retreat. My Leopards that were also in the town, got shot up anf forced to retreat as well. This left Paulshausen wide open to the Bolshies.
 |
| Doomed panzergrenadiers defend Paulshausen |
On my next bound, I withdrew the other M60 unit from the town and pulled back in a line facing it.
 |
| The German-American Bund (post WW2 edition) |
 |
| The Bolshies enter Paulshausen |
 |
| Last stand |
 |
| Noble remnant of a once-proud tank regiment |
Post mortem
The modern rules are really shaping up. Despite the novelty of some of the mechanics, there seems to be a better flow of the game than with the WW2 version.
The Soviet tank fire is anemic in it's ability to hit, but when it hits it can cause some damage. Even then, at one point, John started firing HE at my Leopards because he had a better chance to hit and could inflict damage on me if I rolled "10s" for my armor saves (which I have a talent for doing). Right now, the formula gives the Soviets about 50% of the hit chance for the NATO troops. This reflects loading times, ammunition, and sighting equipment. We might need to revisit that and perhaps bump it up a notch.
I gave the NATO better commanders, but just slightly better. I think I should have made the Soviets a "0" or even a "-1". Soviet tactical doctrine called for masses of tanks and troops. A Soviet tank regiment is not something that needs to be wielded skillfully. Just mass it and bring it on. They don't need a lot of command pips to that. Even a -1 commander can get one pip per turn at worst and four at best.
I made the Soviets 8 morale and the NATO 7. I think I should have made the Soviets lower. At least a 7, maybe a 6. The modern rules let them keep coming on despite being shaken. By giving them 8 morale, they were too hard to delay.
By next game, John may have a draft of the helicopter and airpower rules. I hope to have my PAH-1s ready to go. I'm currently painting Gepards, Rolands, and Stinger teams.