Sunday, December 20, 2015

C'est Incroyable! C'est Manifique!


I dropped by The Panzer Depot in Kirkland, WA today where Steve Puffenberger ran a small Napoleonic game using the Black Powder rules.  The scenario was a small encounter in Spain. Two French brigades with some cavalry and artillery support attacked two smaller British brigades holding a small hill top town position. The British also had a supporting Spanish brigade coming up to their rear. Mark Serafin and I were the Frenchies, Steve and Ken Kissling were the Brits and Spanish.

At the outset, Mark and I viewed our chance of success as minimal. British troops in line holding a decent position are pretty secure and in Black Powder towns are nearly impregnable fortresses. Faced with the immovable object, we did not see our troops as anything like an irresistible force.

I had three légere battalions and two ligne battalions in mixed formation with skirmishers deployed forward. Facing me were Steve's two British line battalions, a battery of 9 pounders, and a rifle company.

Mark had four ligne battalions, a battery of horse guns, and a squadron of Hussars. We also had an 8-gun battery of divisional troops. Facing mark were Ken's three British line battalions with a squadron of light dragoons in reserve.

The game started with a small preliminary bombardment that managed to inflict casualties and disorder a couple of the British line—although that was't something we could take advantage of. Our first turn saw Mark and I both failing our first move attempts and the initiative passed to the Brits.

With turn 2 things started moving faster. Mark and I both managed to move up with all our units and start trading shots between our skirmishers and theirs. On my third turn, I decided to grasp the nettle and charge in with a légere battalion in colonne d'attaque against one of Steve's line units. Another léger battalion smacked into his battery, with the third battalion in support of the two in contact.

I gritted my teeth expecting the withering fire of Steve's British, but he wiffed the shot, rolling 1-1-1-2 for closing fire. My battalion attacking the battery was not so lucky. I took a hit and was disordered. However, I passed the break test and the combats proceeded.

I beat the line battalion just barely, but Steve rolled a '3' for his break test and bye-bye line battalion. The guns also lost the combat and were taken. Having expected the worst, I was suddenly in a commanding position, even though there were two unbroken British line battalions and a detachment of riflemen nearby.

At this point, Steve counterattacked with his remaining line battalion. My closing fire inflicted a casualty, and in the ensuing combat, Steve again lost and rolled low for his break test. The second of his line battalions was gone, only his riflemen remained and his brigade was broken.

Steve counterattacks!
Steve broken, Ken's flank exposed
On my next turn, I attempted to charge the flank of Ken's rightmost battalion, which was now exposed with the collapse of Steve's brigade. However, I failed to roll well enough on my command dice and didn't manage to contact.

At this point, Ken withdrew the battalion into the town before I could try to hit it again. Steve plinked away at one of my légere battalions, which I'd put into line, and managed to cause it to become shaken. Steve would keep at this unit, which remained shaken for the rest of the game, but always managed to pass its break tests.

Ken withdraws to the town
I still had four effective battalions, but I was afraid I'd just keep battering my head against the town. By this time, too, the Spanish brigade had come up, although Steve kept it back and out of trouble.

I charged into the town with one légere battalion and another in support and got shoved back. I tried again next turn and although I lost, I managed to stay in contact.

First assault
On my third attempt at the town, I managed to bring one of the ligne battalions into another face of the two, so I had 2-1 odds, plus more support from other units. In this final attack, the British lost and broke on their break test (they were at -3 for shaken and excess casualties).

Final assault

La ville est à nous!
On Mark's side of the board, he'd been skirmishing with Ken's other two battalions, one of which was in another two section. He'd managed to shoot the other one into a shaken state. With the loss of the one battalion in the town and another shaken, Ken's brigade was broken and the game was over. No one expected the Spanish to save the day. They were too few and too bad.

The game did not go at all as expected. I thought Mark and I would get shellacked on our attempt to take the position. Instead, much to our surprise, the British crumbled in just about 8 turns.

I'm sure the news made Wellington's stiff upper lip a bit stiffer.


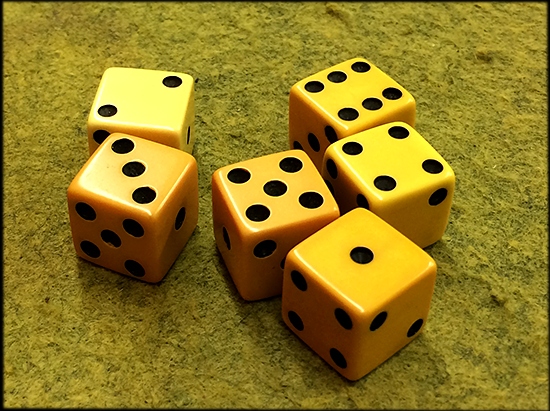
I'd be remiss not to mention that this game saw the debut of my newly acquired vintage bakelite dice. I picked up 25 of them in a few purchases on eBay and Etsy. They're nicely yellowed and range from a kind of jaundiced putty to a deep butterscotch, which gives them character. A nice addition to my dice collection and—for this game at least—lucky.


Dipping Deeper


I've completed 31 figures using the "dip method" in just over a week, which includes 24+ hours for drying the dipped figures. I never had that kind of productivity before. Suddenly painting a lot of figures seems easy and I'm pleased with the results—almost more I am with my traditional, slow method.

The second batch of figures I did were some Thirty Years War officers and sergeants along with the two Renegade ECW test figures. All were in buff coats with riding boots and some kind of armor and sashes. As an experiment after my first batch, I wanted to use a gloss or satin coat pre-dip to see if the less toothy surface reduced the amount of "grime" that comes from the dip.

For the officers/sergeants I used Krylon polyurethane satin. I've used it before as a penultimate coat before the final dullcote. The polyurethane is a great protector of the painted figures. However, it's proven to be a bad pre-dip. It took a long time to dry. The can says that it dries in 15 minutes, but it still felt a bit tacky to the touch after 48 hours. It seemed to hold a lot of the stain rather than slough it off to the crevasses (more on that below).

Second batch of officers/sergeants - a bit darkish
The next batch was more musketeers and some drummers. For this batch I used Rust-Oleum satin enamel as the pre-dip. This turned out much better than the polyurethane and dried quickly hard and smooth.

I dipped both batches at the same time. The first thing I noticed is that the stain seemed to be more viscous than when I'd brushed it on the first figures I did. The can had been resealed well, I think, but it had sat in my cold, cold garage since I used it first. I'm no chemist, but it might be that the cold affects the viscosity of the stain. It seemed to flow and ooze less well than before and wicking/drawing off the excess with the brush didn't seem as effective.

The result is that these last figures had a bit more puddling and, for the polyurethane coated figures, a bit more of the stain stuck to the surface. However, I think the result was mostly good. I let the dipped figures dry for more about 35 hours and then gave a them a spritz of dullcote yesterday evening. With the sheen taken off, the colors came out nicely. Set side by side with the musketeers from the first batch, they don't appear to be different.

First and second batch musketeers side by side
To offset the viscosity problem with the stain, I'm keeping it indoors for the winter. I also transferred it from the can to an airtight mason jar. In resealing the can last time I discovered that my "tapping" the lid with a hammer to seat it fully was bending the can. I don't know my own strength apparently.

On the painting table are the first batch of 16 Imperialist pikemen which are just about ready to spray with the satin enamel for dipping later tonight. I've also got 8 artillerymen and three guns. And adding more clutter to my too cluttered painting table is a batch of 5 Renegade ECW pikemen, an officer, and an ensign. I like how well the two test figures turned out, so I'm going whole-hog on getting my batch of Renegade/Bicorne ECW painted for skirmish gaming.

ECW dullcoated and bases flocked
For now, I'll use the ECW for playing Smooth & Rifled from Dadi & Piombo. Eventually, I hope to use them for Dan Mersey's upcoming Pikeman's Lament, which is his pike 'n' shot variant for Lion Rampant. Alas, the wait will be a long one; Osprey won't publish it until late 2016 or early 2017(!).

I made another raid yesterday on the remnants of The Assault Group figures at The Panzer Depot. At 70% off, they're a great deal. I managed to get another 16 artillerymen from the ECW range (not at all distinguishable from Thirty Years War) as well as some more command figures and musketeers.

Also, in yesterday's mail arrived the two falconets I'd ordered earlier in the week from Old Glory. I already have two that I'm using a battalion guns for the 1672 French.

French falconette (old painting method)
They're very nice models and I want my big tercios to have some light gun support—two can play at this game, Gustavus Adolphus!

The transformative nature of this method kind of astounds me. Some gamers call it the "miracle dip" and I can see why. I spent so much time trying to get subtle shading and highlights in my figures and I look at my quick 'n' dirty dipped figures and like them better. Seeing the figures in macro photos, the smoothness of the shading in the dipped figures is much nicer than my awkward brush strokes. Viewed at table-top distance, my old method looked a lot like solid colors; you couldn't see the effects of the shading unless you looked closely. The dip looks good close and far.

Why, oh why, did I wait so long to join the dippy revolution?

My fear now is that Minwax will discontinue the Tudor stain color. It's already impossible to find in stores. I had to order my can from Amazon.

Wednesday, December 16, 2015

Dip It (Dip It Good)


I've become a devotee of the "dip method" for rapid army painting. I have seen the light and shan't be looking back. I know several gamers who are dippers. I've scrutinized their results and found them to be a delight to the eyes. But I've been hesitant to adopt it because it's such a departure from my traditional method. Old habits die hard, as the saying goes. I've also been reluctant to adopt a "quick 'n' dirty" method, simply because it seems like a cheat.

My traditional method developed over years with only incremental changes. It involves an intricate combination of highlighting, shading, and washing and can be painstakingly slow. As a result, my output over the years has been pitiful. I have many projects that are started but stalled. I have boxes of figures that have been cleaned and primed for painting—or partially painted—and then left to languish. Motivation is certainly a problem, no matter what painting method I use, but the knowledge that I'm facing a slow, painstaking process to get figures painted is no aid to motivation.

When I really concentrate on a figure, I'm very happy with the results. My test case for painting the stalled 1672 project is based on a Swedish uniform color from the Scanian War. It represents the best I can do with my traditional method, although for painting large numbers of figures, it's prohibitively slow, so the units I've already painted for the project use a bit more streamlined process.

Sätt i gång! (fire away!)
Note: The slightly bent musket is post-painting damage from when my evil cat Maebh the Merciless, batted it off the shelf and played floor hockey with it.

When I finally got to the point of trying the dip, I thought about a long-stalled batch of 12 Thirty Years War musketeers, a drummer, and an officer from The Assault Group range. These are beautifully sculpted figures and I wanted to do them justice with a great paint job, but after starting them, I shelved them for years because a) I'm lazy, and b) I didn't want to launch into a solo Thirty Years War project. However, a group of gamers down at The Panzer Depot have been working on a big communal TYW project, so my efforts can supplement that with a tercio or two. The time is right.

So what is the dip method? It's basically using Minwax Polyshades Tudor wood stain to do instant "miracle" shading on figures that are otherwise just blocked out in solid colors (i.e., not shaded or highlighted).

In my lead-up to dipping, I've thought a lot about the mechanics of it. While many dippers actually dip, most use a brush. Actually dipping the figure, apart from getting it all over your hands, requires a lot of flicking to get rid of the excess. Too much stain and you've got a discolored blob. Having watched Steve Puffenberger dip and flick a pile of figures, I decided that's too much work and would probably give me tennis elbow or something. So I opted for brushing.

The trick while painting for the dip is to refrain, despite all temptation, to do anything more than solid colors (although highlighting is up for reconsideration in some cases). That's what speeds it up.

The method also removes detailed face-painting from the process. What to do about faces has always been my downfall. For the dip, I just use my base coat of Howard's Hues Ruddy Flesh and leave it. No sepia wash and detailed eyes. Thank goodness. My hands have never been steady and I'm already using 3x magnifiers to paint with. Any method that produces satisfactory results without painting eyeballs on 28mm figures is OK by me.

Pre-dip blocked out in solid colors
After all the colors were blocked in for the figures, I gave them a spritz of dullcote as final prep for dipping. My impression was that at this point it was an OK paint job, pretty much as when I started painting minis 40 years ago.

With the figures ready to go, I still hestated. I thought of doing one figure and seeing whether I would just ruin it. But after a few days of hestitating, I bit the bullet and went into my garage on Saturday morning with my figures, a can of Minwax Tudor stain, and a brush.

I started with an officer figure in a buff coat. The stain was thinner than I expected (I'd stirred it with a little wooden paddle for a while before brushing it on). It oozed and flowed and puddled into the nooks an crannies of the figure. It also made the detail pop amazingly. I wicked out some excess here and there using the brush and looked on what I'd done. I liked it. With my fears of ruination ameliorated, I went on to the other 13 figures.

The stain dries very glossy. On the recommendation of John of the Panzer Depot, a true dipper himself, I let the stained figures dry for 24 hours before giving them another spritz of dullcote.

The results are very satisfying. The stain darkens the colors overall--not surprisingly. Some would say that the colors become dark and grimy. I think you can counter that by the colors you use. Brighter colors stand out more, but even the darker colors are OK if you go into it understanding that the colors will be some degree darker.

First batch post-dip, post-dullcote
Thoughts on the process

I need to do a bit more wicking away of the stain puddles, I think. I might experiment with a hybrid flick 'n' wick. Even though brushing lets me control how much stain is applied, the stain still puddles like crazy.

I wonder if using a satin or even a gloss coat before dipping would reduce the darkening of the colors. I assume that dullcote has more "tooth" than gloss and therefore keeps more of the stain on its surface. The stain may repel a bit more from glossy or semi-gloss surfaces. I'll have to give it a try.

I think that for some colors that are applied on large areas, like uniform coats, a drybrushed highlight might also help make the post-dip colors brighter.

I might also tend toward lighter colors, which I could get by mixing in a drop or two of white when I'm mixing the paint. I also think that using thinned paints to get a heavy wash will self-highlight to some extent. (I use white primer, so the substrate for the wash lightens the color.)

Online resources

I've found a few places online--though I'm sure there are many more--that offer some advice about the dip:
The future

I'm well-committed to the Thirty Years War project. I've had a large number of figures sitting around for a long time and I just acquired many more. As soon as my recent orders arrive, I'll have enough figures to do two large tercios, two units of dismounted dragoons, three heavy/medium guns, two light guns, two commanded musketeer units, and various command figures.

I've also got many more candidates for dipping. All those primed or partially painted figures imprisoned in boxes can be set free!

I have a lot of single-mounted figures for English Civil War skirmish gaming that are primed and ready. These are Renegade and Bicorne figures, which are BIG 28s (more like 30s). My plan was to do my best traditional method on them, but now I'm thinking that the dip may be the best way to go. I've completed two figures, a Royalist musketeer and a Scots musketeer to see how the dip works for them. Single figures tend to get looked at more closely, so I'm a bit more sensitive to painting them well.

Renegade ECW blocked and ready to dip
There's also the buckets of medieval figures that I have and a big, big box of 28mm Dixon American Civil War figures. (Talking with Kevin Smyth the other day, he's mentioned wanting to paint up his big box of 28mm ACW for Regimental Fire and Fury...)

So, now I've got my marching orders:

When a project comes along
You must dip it
Before the figures sit too long
You must dip it
When the paintin's goin' wrong
You must dip it


Dip it, pilgrim. Dip it good.