

Saturday saw our fourth foray into WW2 skirmish gaming using Warlord Games' Bolt Action rules. Phil Bardsley, Bill Stewart, and I played an initial game of these rules back in early February using the few figures we had painted—mostly Bill's, augmented by a few units from Phil and me.
Several years back Phil and I caught the North Africa campaign bug when Artizan Designs released their WW2 range of 28mm figures. Phil started some DAK and I started some 8th Army and French Foreign Legion (the Free French who fought for the allies, not the Vichy swine). We each got about two squads done and left off for years thereafter.
When Bolt Action came on the scene, I went looking through my boxes to resurrect the units I had finished and to start painting the pile of raw lead I had amassed. That pile included more legionnaires as well as some Italians. Bill had been painting some of Artizan's commandos/S.A.S. as well as a lot of NW Europe Americans and Germans.
What might have been a one-off game has become an irregularly monthly occurance. Mike Lombardy and Dick Larsen are regulars in the games and we have guest appearances of others, like Dave Schueler.
We also had some time to paint. I finally managed to get two more squads of British 8th Army completed along with a mortar, a Vickers MMG, and two bren carriers in desert splinter pattern. I also finished one squad of Italians in their little shorts and sun helmets. Bill managed two squads of Afrika Korps and another two squads of North Africa/Med commandos and a mortar and Vickers for 8th Army. This gave us the opportunity for a game using only North Africa troops, instead of the ersatz forces we've used until now.
Saturday's game was a scenario that came out of my head. Mike and Phil played the Axis (of evil) and Bill, Dick, and I were the Allies. Phil and Mike set up with one squad each plus a MMG and medium mortar in support. The remaining troops were in reserve.
Phil had the Afrika Korps squad on the right while Mike had Mussolini's Merry Men on the left.
 |
| "Is it time to surrender?" |
My attack started inauspiciously when Mike zeroed in on one of my bren carriers with a mortar in the first try. Fortunately, he only set it on fire and the brave crew put it right out.
 |
| An opportune moment to brew a cuppa |
 |
| Avant, képis blancs! |
 |
| Run, Tommy, run! |
 |
| Surprise! |
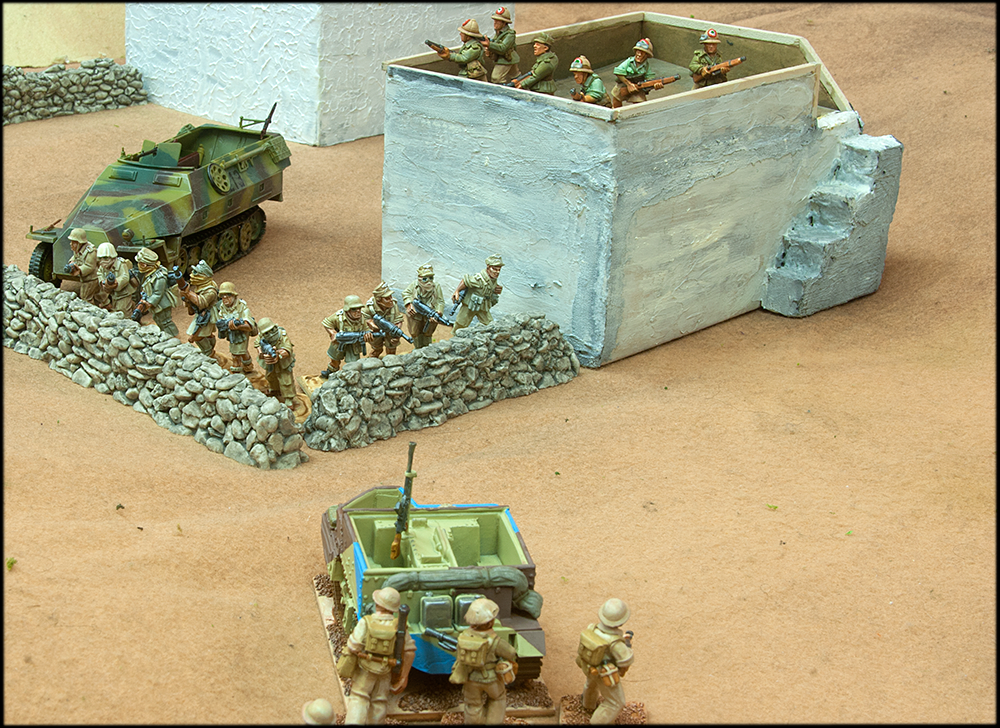
 |
| Fort Apache in the Libyan desert |
 |
| Right in Fritz' face—for now |
 |
| Out of the frying pan, into the fire. |
 |
| While Bill's lads charge to glory in the background, my lads fire from cover |
 | ||
Phil's second squad reinforces the line
|
 |
| Dick's lads advance |
Not content to sit behind his stone wall and be shot at, Mike sent his recently arrived panzergrenadiere to assault my remaining bren carrier. (The other had finally been put out of action by Mike's relentless mortar.) The attack took out the bren easily; however, the troops inside had dismounted turns ago and were still a force to be reckoned with. I also had my command team nearby.
 |
| Ring around a burning bren |
The Italians, too, gave it up after getting to the unrecoverable pin level 9. They never managed to recover from their initial hits and being in the building brought them into spotting range of the mortar, which had zeroed in early on and kept chipping away along with small arms fire that had little effect apart from adding pin after pin.
Finally, Dick's lads on the Allied right got around and flanked Phil's remaining squad (the other was gradually worn down until a single fire action took the rest away.
 |
| Last stand of Phil's Afrika Korps |
Bolt Action has been a lot of fun. Even if it isn't the most detailed set of rules for WW2 skirmish, it stands up well to other sets and has the hallmark typical of Warlord Games rules: you left wanting to play more.
So far we've focused on North Africa, but our next game will move to the other side of the globe.
Banzai!
