Thursday, January 2, 2020

Ó Súilleabháin's lament: The Pikeman's Lament AAR


Chris Craft and I played a 24-point per side game of The Pikeman's Lament today. We used my 28mm English and Irish from Timeline Miniatures. I truly love this range of figures. They're the old Graven Images/Monolith Designs Border Reivers figures that were sculpted by Jim Bowen and sold to Timeline after Jim died. I have a pile of them, which I painted a few years back for The Irish Project back in '17. I've managed to game with them several times, though too few in my opinion. Luckily, I have enough to put on large games supplying the figures for both sides—and I still have more to paint.

We played The River Crossing scenario from The Pikeman's Lament rules, only we ran the river straight across the middle rather than cantered corner to corner. I had fun setting up the board. I've amassed a pretty impressive amount of terrain over the years.


I also took the opportunity to deploy some of the new hedgerows I've been working on.


Chris took the hated English and I took the Irish. Chris' army was pretty straightforward:

   2 x Pikes
   4 x Shot

I went a little more diverse:

   1 x Aggressive Forlorn Hope
   1 x Aggressive Gallopers
   2 x Shot
   3 x Commanded Shot

I had a slight advantage in shooting, although the Commanded Shot can be brittle with only 6 figures. My thinking was that the advantage of moving freely through the rough terrain would help. It didn't. My real hope was that my aggressive melee units would pack the punch I needed.

The river between us and the brambles lining the banks were all rough terrain with just one bridge in the middle. Chris deployed with his two Pike units aimed straight at the bridge supported by his Shot.


I kept my two Shot opposite the bridge, supported by my Forlorn Hope (gallowglas) and the Gallopers. I put the Commanded Shot (kern) out on my flanks.


On Turn 1, Chris rolled the Holy Grail of 6-6+6 for his first activation. He took another 4-point Pike unit. I hoped I might get the same luck, but I settled for at least not getting the unHoly Grail of 1-1+1 and losing 4 points of troops.

A lot of our shooting was less deadly than it might have been because we shot a lot at each other while in cover or across the stream, which we counted as cover with all the brambles 'n' such obscuring the target.

Chris came on the first turn making a beeline over the bridge with two Pike units. I responded by shooting—or trying to shoot.


My left Shot unit started banging away at the lead Pike unit getting a few hits. My right Shot unit kept flubbing its activation rolls. We used the alternative activation that allows a player to attempt to activate all units in a turn rather than the standard one fail and done method.

Chris moved his third Pike unit, the reinforcements he got from his lucky 6-6+6 activation roll, against my kern (Commanded Shot) on the left. He also ran one of his Shot units up in support.


The action at the bridge see-sawed. After getting just the head of the column over, Chris' Pikes got sent back after taking shot and failing morale. After rallying, Chris pushed the pikes back over and got sent back again.


All the while, my Shot, which has been targeting Chris' Pikes, has been taking fire from Chris' Shot and taking casualties. After several failed activation attempts, my right Shot unit finally gets into action. I couldn't pass my activation, but I managed to hang tough on every morale check.

I moved up my gallowglas—commanded by himself, The Ó Súilleabháin—to get within striking range of the Pikes, but then I shot the Pikes and sent them scurrying out of my charge range.


On my left, Chris was pressing with his Pikes. I'd managed to cause one Shot unit to rout away, but had lost one of the two kern units I had there. Chris charged his Pikes across the river into my kern, but since we were fighting in rough terrain, the advantage was mine. He got repulsed with loss, but I took some damage as well.


He charged once again with similar result. I finally managed to get a shot at him that made his Pikes go away after a badly failed moraled test.

After a few more turns of sparring, I finally got the chance to strike in with my gallowglas, The Ó Súilleabháin at their head. Chris' Pikes were much diminished now and the charge broke them.


With his lead Pike unit gone, Chris formed his second one, commanded by his officer, in Close Order awaiting my onslaught. Rather than strike in with my gallowglass, I sent in my horsemen.


The result was predictable. I got bounced with loss, but I managed to inflict some loss on him. I charged in again and again got bounced with loss. We were chewing each other up pretty equally, except that I had fewer men to lose. I did, however, manage to pass all my morale tests.

With my horse battered down to a lone survivor, I sent the gallowglas against Chris' now much-battered last Pike unit. At the same time, I sent my last horsemen against Chris' Shot unit.


This finally did the trick and the unit went down, with Chris' officer. My last horseman did enough damage to cause Chris' Shot unit to waver from which it never recovered until it finally broke from a failed rally test.

The Ó Súilleabháin was now alone, his gallant gallowglas dead around him. He dodged every lucky blow. My only other unit was a half-strength Shot unit.


In the ensuing turns—we'd rolled for end of game, but it didn't—I got my Shot unit over the river, wisely avoiding the bridge where I wouldn't benefit from cover. Chris had two diminished, but still above half-strength, Shot units. He used these to dispatch The Ó Súilleabháin. No foe could beat him hand-to-hand; his end came from an enemy far away.

My last battered unit of Irish Shot grimly held its ground across the bloody river, giving the honor of the day to the Irish—no Englishmen had made it across and lived. But like Doughty Douglas at Otterburn, a dead man won the fight and The Ó Súilleabháin's favorite piper played his lament as the sun set.


Pikeman's Lament: Plug your bayonet!


With my 1672 project in full swing and steadfastly directed toward The Pikeman's Lament, I've been noodling on some house rules specific to the use of plug bayonets, but also some ideas for integrating Pike and Shot units in TPL generally.

Musketeers of the 1670s were typically equipped with a plug bayonet, which is called a dagger in English drill manuals of the era; the command for fixing your bayonet was actually, "Screw in your dagger." The plug bayonet remained in use through the end of the 17th c. Even though the socket bayonet had been developed, the muskets produced for the era didn't have the necessary lug to fix the newfangled socket bayonet, which meant that they tended to fall off.

The plug bayonet was fairly secure once it was fixed in place. However, the barrel of the musket being plugged meant that the unit couldn't shoot. Musketeers had to choose between shooting and fixing bayonets and might easily get caught dithering between the two choices, such as happened to poor Hugh Mackay's troops at Killiecrankie in 1689.


The Plug Bayonet rules are pretty straightforward and are just a variation of the standard rules for allowing Shot units to form Close Order—except for the reaction ability.

The Pike & Shot rules are more detailed, but actually pretty simple in execution. They only seem complex because I've tried to account for every "what if" I could think of.

Plug Bayonet

Shot units in the 1670s can form close order as described on page 21 of the rules. However, when in close formation, the unit cannot fire because it represents shot with plug bayonets fixed in the barrels of their muskets.
  • It requires a move activation to go into or out of close order (i.e., fix or unfix the plug bayonets)
  • Units that enter rough going lose the +1 to their attack and defence scores, but are still considered to have plug bayonets fixed until unfixed by a move action.
  • As a reaction to being charged by mounted troops or clansmen, shot may attempt to go into close order, succeeding on a roll of 7+. If unsuccessful, the unit becomes Wavering.


Pike & Shot

Shot units may be protected by Pike units when attacked by mounted troops or Clansmen. With a move activation, a shot unit that is within a half move (3") of a Pike unit that is 6 models or more, not wavering, has not yet activated this turn, and is not in rough terrain may form close order with the Pike unit and receive a defensive benefit when attacked by mounted troops or Clansmen.

Shot forming up with Pikes in a "hedgehog" benefit from the protection of the pikes, but become more vulnerable to shooting due to their denser formation.

Forming Pike & Shot
  • On the successful move activation, move the shot into contact with the pikes and formed around them. This is an exception to the rule that friendly units must be at least 1" away at all times.
  • Although the Pikes do not roll for activation nor move, they are considered part of the action and they are considered to have been activated for that turn.
  • The Pikes are considered to be in close order, per the special rule on page 20; the Shot are not in close order, i.e., their plug bayonets are not fixed and they can still shoot.
  • While pike and shot are formed in this way, the Pikes may not activate separately. The shot may activate to shoot or move.
  • The formation may not move, but a Shot unit can use a move action to move away from the Pike unit up to 3", thus breaking the formation.
  • Once formed, the Shot is considered the active unit, i.e., the Pikes become a hedgehog defence in which the Shot takes shelter. All shooting and attacks are considered to be against the Shot unit. If attacked, only the Shot take casualties. If shot at, both units take the same number of casualties.
  • Up to two Shot units may form close order with the same Pike unit. The Shot units are targeted separately for attacking and shooting, but both benefit from the defence values of the Pikes.

Attacking Pike & Shot
  • A Pike and Shot formation may never attack.
  • If the formation is attacked by mounted troops or clansmen, the Shot defend using the defence value and stamina of the Pikes (including the +1 for).
  • If the formation is attacked by other foot units, the Shot does not use the defence values of the pikes, i.e., it defends using its own defence value and stamina.

Shooting from Pike & Shot
  • Shot that shoots while in this formation has a -1 modifier to their dice scores. [Note that a normal Shot unit, with a 5+ shoot value, could effectively only shoot at 12" range, hitting on 6, unless using First Salvo.]

Morale in Pike & Shot
  • If a morale test is required, each unit in the formation tests separately.

Breaking Pike & Shot formation
  • As noted above, a Pike & Shot formation is broken when the Shot unit moves away. Thereafter, the Pike and Shot unit act independently, per the usual rules.
  • The formation is also broken if either of the following occurs:
    1. The Pike unit falls below 6 figures [Note that the Shot unit may fall below 6 figures without affecting the formation.]
    2. If either unit in formation becomes Wavering.
  • If the formation is broken by figure loss or wavering, separate the units with 1" between them.
  • If two Shot units are formed with one Pike unit, breaking the formation of one may not affect the other. If one Shot unit becomes Wavering, it does not affect the formation between the Pikes and the other Shot unit. However, if the Pike unit becomes wavering or falls below 6 figures, the formation is broken for both Shot units.

 Shooting at a Pike & Shot  
  • If the formation is shot at, use the stamina of the Pike unit; however, any figure loss is taken by both units in the formation, i.e., every 3 hits results in a figure loss from both the Pike unit and the Shot unit.

Forming Pike & Shot as a reaction
  • As with Plug Bayonet, a Shot unit that is attacked by mounted troops or Clansmen may attempt to form with a Pike unit that is within a half move (3"), succeeding on a 7+. If successful, the units form per the rules above. If unsiccessful, both the Shot and the Pikes become Wavering. If the Pikes become wavering and are already formed with a second Shot unit, that formation is broken. Move the second shot unit 1" away. The second Shot unit does not become Wavering.

Friday, December 27, 2019

Thither 1672


In a previous post, I considered which direction to go with my 1672 project. A few years back, I purchased piles of the Northstar 1672 range (formerly Copplestone Glory of the Sun range). At the time, I was going great guns with writing my own rules, Pike & Periwig. While still a noble project, I'd lost momentum and haven't got it back yet. That left me wondering what to do with all the figures I have, mostly partially painted or just bare lead.

After properly pondering the matter, I've settled on The Pikeman's Lament for many reasons. The rules are easy to learn, fun to play, open to house rules, great to run with larger games in convention settings. I'm a huge fan of living rampantly. It's only natural that I've settled the question the way I have.


Now that my course is set, I've been churning out minis for the project and have in mind a large game for Enfilade!, our local convention in May. I've been helped a lot by the fact that I had several minis partially painted from back when I was writing my own rules.

I also have a few units painted and based, which is problematic. I hate rebasing. I'll need to spruce up and dip the minis to make them match my current style. However, the biggest issue is that the infantry units for Pike & Periwig are 18 figures: 5 pikemen, 10 musketeers, 1 ensign, 1 sergeant, 1 drummer. The units painted can't be re-used as Pikeman's Lament units as is; the numbers are wrong.


So far, I have completed and based a unit of French pikemen. They carry flags for Régiment de Picardie, but the uniform is the standard French gray coats with gray cuffs, a uniform worn by a large number of the French regiments in this period. In the French Wikipedia article I saw a picture of a different uniform with a white coat and red vest, cuffs, trousers, and hose. That's the first I've seen of it and I'm not sure if it's correct. The Osprey title on Louis' army has, as I've painted, gray coats with gray cuffs and no information on vest, trousers, and hose.

The distinctions I'm making between gray-coated, gray-cuffed units will be the flags and the trim such as the aiguillettes, hat bands, trousers & hose. I gave Picardie red aiguillettes, hat bands, and hose with green-brown trousers. I'm working on Regiment Normandie, which will have blue distinctions and also black cuffs for the sergeants and officers.


I have one unit of 6 grenadiers completed and based.


I have a unit of 12 Swiss musketeers completed and based, with another 12-figure unit in the works along with 12 Swiss pikemen.


I have two 12-figure musketeer units painted and dipped for Régiment de Picardie  at this point. I only need to brush on the matte varnish, base them, give 'em a last spritz of dullcote et voila!


I also have some artillery with gunners and an officer figure [actually the Louis XIV figure by Phoenix Games, which is no longer available.]


Finally, I just dipped some French dragoons. I'll eventually have three 6-figure units that will be a mix of dismounted, mounted, and standing horses.


I have a smattering of already-begun French units that I need to finish, likely in the upcoming week, which I have off from work. These units are the second Swiss musketeers, Swiss pikemen, a second unit of 6 grenadiers, and a unit of French cavalry.

After that, I'm starting a few units of English that will include two 12-figure musketeer units and a 12-figure pike unit that I'll paint in red and green as the Coldstream Guards [notably the future regiment of Rudolf Rassendyll]:


I've also got some firelock figures that I'll use for a 12-figure musketeer unit of the Buffs in yellow and red. These were originally marines and eschewed both matchlock and pike. They'll be veteran shot in TPL terms.

I'm pretty happy with this direction. I'm very happy with how quickly I'm churning out units. The dip has—as I've written many times before—revolutionized my painting output. Since November, I've painted more figures than I'd manage in a whole year using my pre-dip technique. My only regret is that I don't paint eyes. They're nor really visible on the table top, but the lack of them shows in close-ups when whole regiments have the Orphan Annie look:


Saturday, November 9, 2019

Whither 1672?


I've been reevaluating my projects lately. It's just November, but I'm looking back on a kind of banner year for gaming, both in the number and diversity of games played and also in how many figures I've painted.

As always, best-laid plans go by the wayside as unintended projects rear up and I with my impulsive, impetuous nature jump right in. Mortal Gods, Test of Honor, and SPQR spring to mind as projects that weren't on my radar on January 1, but which I've either started this year or completed. Saga was a project I started in September last year. Although at the time I only had my El Cid Spanish I painted for Lion Rampant to press into service. My Welsh faction for Saga was completed in January. I'd started with Jugula some time ago, but only got around to completing my horde of gladiators in January.

Some longstanding projects languish, victims of the new new thing, whose shiny delights displace and somnolesce earlier distractions. One of those slumbering distractions is the 1672 Project that I started long ago, but which is now coming back online as the new old thing.

The initial impulse for the 1672 Project started around 2009 when Mark Copplestone released the first packs of his Glory of the Sun range covering late 17th c. European armies for the early wars of Louis XIV. At that time Bill Stewart, Phil Bardsley, Rich Knapton, Doug Hamm, and I got enthused and started buying and conspiring. We planned on using Beneath the Lily Banners, although there was some reservation amidst concerns that the rules (version 1) had some gaping holes and staggering vagaries. The project sort of fizzled. Rich and Phil are now deceased. North Star bought the range and re-named it North Star 1672. I can't gauge Doug's and Bill's interests at this point in time. Bill lives near enough to me and we game often; however, he's undecided about what to do with the figures he has (and has yet to paint). Bob Mackler is enticing him towards a different big battle style project with the figures. Doug is 150 miles away on a good day—and on the foreign side of an international border. Past conspirators in other projects have no interest in the era as a wargaming subject. My expectation is that any further efforts I make for the 1672 Project will be solo. Alone again, naturally.

So, the big question now that I'm slapping paint on lead again is what do I want to do with them.

Pike & Periwig

I earnestly went the solo route for a while and even got fairly well along with writing my own set of rules for it, Pike & Periwig. I like my rules, although I have more work and lots of play-testing to get them right, but I'm not sure I really want to commit myself to a system of my own design and put all my eggs in that basket.


I think that Pike & Periwig might be a lot of fun, but I'm absolutely certain that I'd be the only person painting and basing figures for it. Plus, I'd have to teach everyone the rules and defend my glaring idiosyncrasies. Writing rules is a rabbit hole down which people like me disappear, going deeper into the minutiae of getting right this or that representation of some obscure detail of the military art of the period, only to find in the end that it adds nothing to the play of the game, or even distracts from it.

Nevertheless, saying adieu is hard.

File Leader

I recently got a copy of the venerable vintage set of company-level rules File Leader by Pete Berry and published by Partizan Press in the 1980s. I really like them and have been mulling over the possibility of using them for the 1672 Project rather than use Pike & Periwig.


I have reservations there, too, because the basing system is unique enough to make re-use of the figures difficult without also rebasing them. Basically, the foot are six figures on 60mm square bases (or 'trays' as the rules call them), the horse are three figures on a 60mm square base, officers (which include ensigns, drummers, etc.) are on 40mm square bases.

The rules were written for 25mm figures back before serious scale creep became a thing. Fitting six of the North Star 28mm foot figures on a 60mm square base is no problem, but three horse on the same base size is pretty crowded. They'll fit, but it'll be cozy. According to Mr. Berry himself, the base sizes for horse and foot (and guns, for that matter) need to be the same. Maybe adopting 70mm or 75mm square basing would resolve the horse crowding without being too big for the foot. It's probably better for the guns as well. The small battalion guns fit on a 60mm square base easily, but the larger field guns are about 80mm long and hang out fore and aft from the base. However, at the company/troop level, I don't think I'll need a lot of field guns.

I would also want to tweak a few things. Pete wrote the rules for the English Civil War, but they're adaptable to the latter 17th c. I'd want to call out specific rules for grenadiers and plug bayonets.

I'm finding it hard to pull the trigger and commit to File Leader. There are some things about the rules that I really like, but I'm not sure if they're rules I can see playing a lot over time. I'm just old enough that my gaming days are starting to look like sand flowing through an hourglass. I don't want to put a lot of time, resources, and energy into gaming ventures that go nowhere.

The Pikeman's Lament

I love The Pikeman's Lament. As regular readers of this blog know, I'm rampant in my love for Dan Mersey's and Michael Leck's work with this series of rules.


I think TPL could do the 1670s well. I only hesitate because I've got a lot of 'Rampant' projects going on. I have a lot of AWI and ACW for Rebels and Patriots—it was a major focus this year. Already for TPL, I have a pile of figures for The Irish Project and have recently acquired more, in addition to the unpainted horse that beckon my brush. I have some figures painted for ECW and many, many more partially painted or naked lead yearning to be clothed. I don't lack for pikes and shots.

It's my lack of lacking that gives me pause. I love the pike 'n' shot period, so I hesitate making all my projects with one set of rules, no matter how much I like them. I do have another slumbering project for the Thirty Years War that will be use the Pike & Shotte rules from Warlord Games, but that's been off the back burner and into cold storage since before the earth cooled (although I'd like to see it revived at some point). That project also relies on combining with other peoples collections to play games. For 1672, I'm painting both sides, the terrain, and supplying all the dice, too.

At this point, The Pikeman's Lament is looking to be the most likely candidate. I don't have to write the rules and they're a finished product. The only thing I'd do is tweak the close order rule for shot units to reflect the use of plug bayonets; namely, when in close order, shot can't shoot. I think I'll also allow forming close order as a reaction to being charged. For example, as a reaction, a shot unit can form close order on a roll of 7+ on 2D6. If they try and fail, they become wavering.

I'm getting close to needing to base the figures I'm painting now, so I'll need to make a decision. If I go with TPL, I'll use the standard 3-2-1 basing that I've used for my other 'Rampant' projects so far.

Other considerations

I mentioned Pike & Shotte for my TYW project. I could use the rules for this as well, but I find TPL more enjoyable and I don't want to commit to a big battle project, especially when I'm painting all the figures.

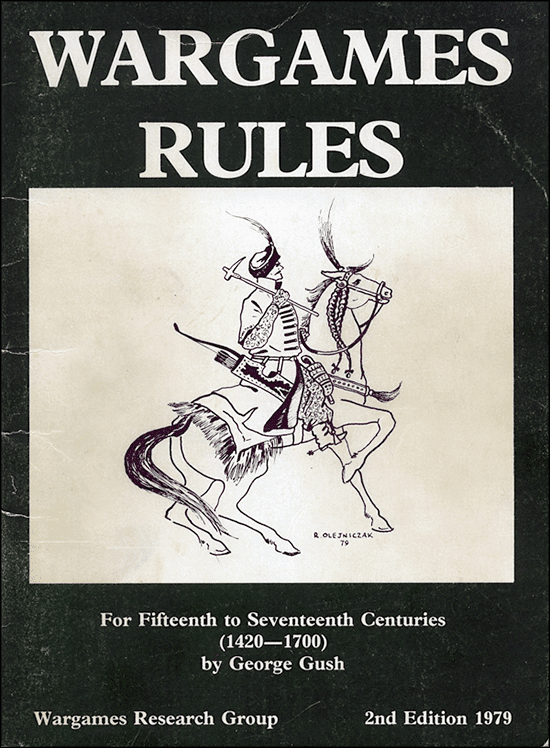
One idea that's been way in the back of my head is using the excellent WRG Renaissance rules by George Gush.


I played these rules a lot in the late 70s and early 80s. I've retained a strong love for them, even though it's been a dozen years since the last time I played them, a game using Kevin Smyth's later 100 Years War figures. Back in the day, we played later 17th c. with them. I had a Brandenburg army using the excellent Dixon Grand Alliance range (sculpted by Mark Copplestone) that I sold when I went away to seminary in 1986. I always wanted to recreate an army with the Dixon figures. I started trying 30 years ago; it hasn't happened yet—but I did buy some figures.

A similar option would be to use Dave Millward's Musketeer rules. They're like Gush's rules, but a bit simpler.


One drawback with either Gush or Millward is that the style of the rules is vintage. I'm not sure whether I could entice enough people to play, even if I'm supplying all the figures, terrain, dice, and free beer. Kevin Smyth and I had a short-lived stab at reviving WRG ancients. We played a few games, but in the end, we couldn't sustain interest. As deep as my nostalgia runs for the Gush Renaissance rules, unless there were some groundswell of interested players, it's doomed to scratch an itch and then languish.

Another, more remote and even vintager idea, is to use the WRG 1685-1845 rules. They might require a slight bit of tweaking to eke the rules back a decade from their starting point.


One final consideration I had was to use The Complete Brigadier. Also just slightly out of our period, but capable of being easily adapted. I've owned more than one copy going back years, they're intriguing, but they reward only diligence. The system is a bit peculiar, I'm not sure if I could draft people into playing it.


Final thoughts

At this point, the odds are good that I'll use The Pikeman's Lament. I don't want the figures to languish forever. I've even just ordered some Swiss Guard for Louis. I also just started a dozen French grenadiers and am getting ready to clean and prime a lot of French musketeers, including some figures with flintlocks that I'll paint as Fusiliers du Roi.

More posts to follow, I hope, that will track my progress and let you know what direction I've settled on. I know you're on the edge of your seats.